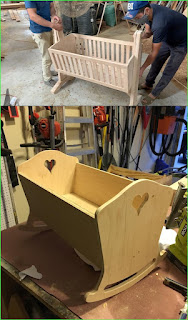
How to make a cradle with durable and natural materials

Building a Cradle: A Natural & Durable DIY Project

So, you're thinking about building a cradle for your little one? That's wonderful! There's something incredibly special about crafting something yourself, especially something so precious as a baby's cradle. And using natural materials? Even better! This project isn't for the faint of heart â€" it requires some woodworking skills â€" but with a little patience and the right instructions, you can create a beautiful, sturdy, and safe cradle that will become a family heirloom.

Choosing Your Materials: Natural and Strong

The key to a durable cradle is selecting the right wood. You want something strong, but also relatively lightweight and easy to work with. Avoid anything treated with harsh chemicals, as those are definitely not baby-friendly. Here are some excellent options:

  • Hardwood: Think oak, maple, cherry, or walnut. These are strong, long-lasting, and beautiful. They might be a bit pricier, but the quality and longevity are worth it.
  • Softwood (with caution): Pine, for example, is a softer wood and requires extra care to ensure durability and safety. You'll need to select planks free of knots and use thicker pieces.
  • Plywood (Birch or Poplar): Plywood can be a good option for certain parts of the cradle, particularly the base, providing strength without excessive weight. Make sure it’s a high-quality, formaldehyde-free plywood.

Beyond the wood, consider these:

  • Non-toxic finish: Absolutely crucial! You'll want a finish that is completely safe for your baby. Look for water-based, non-toxic sealants, specifically designed for children's furniture. Linseed oil is a natural option but requires several coats and regular maintenance.
  • Natural fiber mattress: Choose a mattress specifically designed for cribs and cradles, made from natural materials like organic cotton or wool. Avoid anything synthetic.
  • Natural rope or webbing for the suspension (if using a rocking cradle): Avoid anything that could fray or break easily.

Designing Your Cradle: Simple is Best

Don't overcomplicate things! A simple, classic cradle design is often the safest and easiest to build. Sketch out your design first. Consider these basic elements:

  • Base: A sturdy, flat base that will support the mattress.
  • Sides: These will need to be high enough to prevent the baby from rolling out, but not so high that they're difficult to access.
  • Headboard and Footboard: These can be simple or more elaborate, depending on your woodworking skills and aesthetic preferences. They should be securely attached to the sides.
  • Rocking mechanism (optional): If you want a rocking cradle, you'll need to incorporate a sturdy rocking base or curved supports.

Important safety note: The spacing between the slats or bars on the sides must meet safety standards to prevent your baby from getting their head or limbs stuck. Research these standards carefully before you begin.

Construction: Step-by-Step Guide (Simplified)

This is a highly simplified overview. A complete guide would require extensive diagrams and detailed measurements. For detailed instructions, consider consulting woodworking plans specifically designed for cradles.

Cutting and Preparing the Wood:

Carefully cut your wood according to your design. Sand all pieces thoroughly to remove any splinters or rough edges. This is a critical step for baby safety!

Assembling the Frame:

This typically involves joining the base, sides, headboard, and footboard. Use strong wood glue and appropriate joinery techniques (like mortise and tenon or dowel joints) for a secure and durable construction. Clamps are your friend here!

Adding the Slats or Panels:

Securely attach the slats or panels to the sides, maintaining the required spacing for safety. Use screws or strong wood glue, depending on your design and the type of wood you are using.

Finishing Touches:

Once the cradle is assembled, sand all surfaces again to ensure smoothness. Apply your chosen non-toxic finish following the manufacturer's instructions. Allow ample drying time between coats.

Adding the Rocking Mechanism (If Applicable):

If you’re making a rocking cradle, carefully attach the rocking base or curved supports, ensuring they are securely fastened and balanced. Test it thoroughly before placing your baby in it.

Safety First! Absolutely Essential Considerations

This is perhaps the most important section. Building a cradle is not just about aesthetics; it's about ensuring the safety of your precious little one. Consider these critical points:

  • Stability: The cradle should be incredibly stable. Test it rigorously to ensure it doesn't wobble or tip easily.
  • Spacing: Meet all applicable safety standards regarding slat spacing to prevent your baby from becoming trapped.
  • Hardware: Use high-quality screws, bolts, and other hardware specifically designed for furniture making. Avoid anything that could easily come loose or present a choking hazard.
  • Mattress Fit: The mattress should fit snugly within the cradle frame to prevent the baby from rolling into the gap between the mattress and the sides.
  • No sharp edges or corners: Sand everything meticulously and round off any sharp edges or corners.
  • Regular Inspection: Inspect the cradle regularly for any signs of wear and tear or loose components.

Frequently Asked Questions

  • How long does it take to build a cradle? This varies greatly depending on your experience, the complexity of the design, and the amount of time you can dedicate to the project. Expect to spend several days, perhaps even weeks, if you're a beginner.
  • Is it cheaper to build a cradle than to buy one? It depends on the cost of materials and your labor value. If you already have many of the necessary tools, it could be cheaper. However, the time investment should be considered.
  • What if I make a mistake? Don't panic! Woodworking involves imperfections. If you make a mistake, try to fix it carefully. Sometimes you might need to start again with a specific piece.
  • Can I use reclaimed wood? Potentially, but be extremely cautious! Make sure the wood is clean, free from harmful chemicals, and free of splinters. Proper sanding and sealing are crucial.
  • Where can I find plans? There are many woodworking plans online and in books. Search for "DIY cradle plans" or "natural wood cradle plans".

Building a cradle is a labour of love. It requires dedication, skill, and attention to detail. But the result â€" a beautiful, safe, and uniquely crafted cradle for your baby â€" is an incredibly rewarding experience. Remember to prioritize safety above all else, and enjoy the process!
Share:

Affordable cradle woodworking plans for DIY enthusiasts

Rock-a-Bye Baby: Affordable Cradle Woodworking Plans

Crafting a beautiful and functional cradle for your little one is a rewarding DIY project. Forget the exorbitant prices of store-bought models; with readily available materials and these detailed plans, you can build a cherished heirloom at a fraction of the cost. This guide provides step-by-step instructions and tips to help you create a safe and stunning cradle that will last for generations.

Choosing Your Wood and Tools

The success of your project hinges on selecting the right materials. Pine is an excellent, affordable choice known for its softness and workability. Its smooth surface is gentle on baby’s skin, and its light color provides a blank canvas for personalization. Alternatively, consider basswood for a slightly more durable and slightly more expensive option. Avoid woods that are prone to splintering or contain harmful chemicals. Before you start, gather your essential tools: a circular saw, a jigsaw, sandpaper (various grits), wood glue, clamps, a drill with drill bits (various sizes), screws, and wood finish (non-toxic and baby-safe). A measuring tape, pencil, and safety glasses are also crucial for accurate work and personal safety.

Step-by-Step Construction Guide

Building the Cradle Base

Start by cutting the base pieces to your desired dimensions. The plans below provide specific measurements, but you can adjust them to fit your space and aesthetic preferences. Ensure the base is perfectly square and use wood glue and screws for robust assembly. Remember to pre-drill pilot holes before screwing to avoid splitting the wood. For added stability, consider adding cross-supports underneath the base. Once the glue has dried completely, carefully sand all surfaces to remove any splinters or imperfections.

Constructing the Sides and Headboard

Next, assemble the cradle sides, paying close attention to the angle of the headboard and footboard. These pieces will determine the overall look of your cradle and contribute to its structural integrity. Use the same technique as with the baseâ€"wood glue and screws, pre-drilled pilot holes, and careful sanding. Ensure the sides are securely attached and aligned to create a safe and comfortable sleeping area for your baby.

Adding the Slats and Mattress Support

The slats provide essential ventilation and support for the mattress. Cut these to the correct length and space them evenly across the cradle’s interior. Again, wood glue and screws are your allies. Once the slats are installed, create a support structure for the mattressâ€"this can be simple cross-beams or a more elaborate framework. The mattress support should be firm but allow for slight give.

Finishing Touches and Safety Checks

Once the cradle is structurally complete, it’s time to apply a baby-safe finish. Choose a non-toxic, water-based sealant or paint that is specifically designed for children’s furniture. Apply multiple thin coats, allowing each coat to dry thoroughly before applying the next. Finally, and most importantly, conduct a thorough safety check. Inspect every joint, ensuring all screws are tight and there are no sharp edges or splinters. The cradle should be sturdy, stable, and completely safe for your little one.

Optional Enhancements

Personalize your creation! Consider adding charming details like:

  • Decorative carvings or inlays.
  • A painted design or a soft, neutral stain.
  • Wheels for easy mobility (ensure they are securely attached and lockable).
  • A padded, removable liner for added comfort and easy cleaning.

Remember, building a cradle is a labor of love. Take your time, follow the instructions carefully, and enjoy the process of creating a unique and cherished piece for your baby. The end result will be a beautiful and safe cradle that you’ll proudly display and cherish for years to come.

Share:

Build a chaise lounge with wheels for easy mobility

Building Your Dream Wheeled Chaise Lounge: A DIY Guide

Hey there, fellow comfort seekers! Ever wished you could just effortlessly wheel your relaxation station around the garden, patio, or even inside the house? Well, you’re in luck! This guide will walk you through building your own wheeled chaise lounge, a project that's surprisingly achievable even if you're not a seasoned carpenter. Get ready to get your hands dirty (in a good way!) and create a piece of furniture you'll absolutely adore.

Planning Your Perfect Chaise Lounge

Before we dive into the tools and materials, let's talk about design. The beauty of a DIY project is the customization! Think about where you'll primarily use your chaise lounge. Will it be mostly outdoors, battling the elements? Or will it be an indoor luxury piece? This influences your material choices significantly.

Choosing Your Materials

For the frame, you have several options:

  • Pressure-treated lumber: A great choice for outdoor use, offering durability and resistance to rot and insects. Just make sure to seal it properly to prolong its lifespan.
  • Cedar or redwood: Naturally resistant to rot and decay, these woods are beautiful and require less maintenance than pressure-treated lumber, though they're more expensive.
  • Metal piping (steel or aluminum): A durable and potentially lighter-weight option, especially if you're concerned about weight and mobility. Consider powder coating for weather protection.

For the seating and back support, you can get creative:

  • Outdoor fabric: Durable and weather-resistant, available in a huge array of colors and patterns.
  • Outdoor cushions: Provides plush comfort and can be easily removed for cleaning or storage. Look for quick-drying foam.
  • Rope or webbing: A more rustic and stylish option that requires some experience in weaving or knotting.

Measuring and Sketching

This is crucial! Grab a pencil, paper, and a tape measure. Sketch out your chaise lounge to scale, noting the dimensions of the frame, seating area, back rest, and leg rests. Consider your own height and body proportions for the most comfortable experience. A good starting point is a total length of around 6-7 feet, with a reclining back angle of around 120 degrees.

Gathering Your Tools and Materials

Now for the fun part â€" collecting everything you'll need. This list might seem extensive, but trust me, having everything on hand makes the process so much smoother.

  • Wood/metal for the frame: Based on your chosen material and dimensions.
  • Screws or bolts: Appropriate size and type for your frame material.
  • Saw: Circular saw or hand saw, depending on your comfort level and the materials.
  • Drill: With various drill bits for pilot holes and screwing.
  • Measuring tape and level: Essential for accuracy and ensuring a stable frame.
  • Sandpaper: To smooth any rough edges and splinters.
  • Wood glue (if using wood): For added strength and stability.
  • Clamps: To hold pieces together while the glue dries.
  • Sealer/paint/stain: To protect your frame from the elements (if needed).
  • Fabric/cushions/rope: Your chosen seating material.
  • Staple gun (if using fabric): For attaching fabric to the frame.
  • Wheels (heavy-duty casters): Choose wheels appropriate for the weight of your chaise lounge and the surface you'll be using it on. Look for locking casters for extra safety.
  • Wheel brackets or plates: To securely attach the wheels to the frame.

Constructing the Frame

This is where your design comes to life! Carefully cut your chosen frame materials to the dimensions you've planned. Use wood glue and screws (or bolts) to assemble the frame, ensuring all joints are strong and secure. If using wood, pre-drill pilot holes to prevent splitting. Remember to check for squareness and levelness throughout the process. This is not the time to rush! Take your time and double-check your measurements.

Adding the Wheels

Once the frame is built and sturdy, it's time for the wheels! Attach the wheel brackets or plates to the underside of the frame, making sure they’re evenly spaced and securely fastened. Then, mount your chosen wheels onto the brackets. Test the mobility â€" the chaise lounge should roll smoothly and easily.

Finishing Touches: Seating and Aesthetics

Now comes the part where your chaise lounge really starts to shine! Attach your chosen seating material â€" fabric, cushions, rope â€" to the frame. Use a staple gun for fabric, strong adhesive for cushions, and secure knots for rope. Remember to leave enough space for comfort and avoid bunching or wrinkles.

Once the seating is complete, apply your chosen sealer, paint, or stain to protect your frame. Let it dry completely before using your chaise lounge. If you’re working with wood, sanding down the edges will give it a more professional and smoother finish.

Enjoying Your Creation!

Congratulations! You've built your own custom wheeled chaise lounge. Now, relax, unwind, and enjoy the fruits of your labor. Remember to occasionally inspect your creation for any loose screws, bolts, or worn fabric. A little maintenance goes a long way in prolonging its lifespan.

Commonly Asked Questions

Q: What kind of wheels should I use?

A: Heavy-duty casters are recommended, as they can handle the weight of the chaise lounge and provide smooth rolling. Consider the surface you’ll be using it on â€" outdoor surfaces may require larger, tougher wheels. Locking casters are also a good safety feature.

Q: How much does this project cost?

A: The cost varies greatly depending on the materials you choose. Using reclaimed lumber or less expensive materials can significantly reduce the cost. Expect to spend anywhere from $50 to $300 or more, depending on your choices.

Q: How long does it take to build?

A: The build time can range from a few hours to a couple of days, depending on your experience and the complexity of your design. Don’t rush the process, and take your time to get it right.

Q: Can I build this without prior woodworking experience?

A: Absolutely! This is a manageable project for beginners. Take your time, follow the instructions carefully, and don’t hesitate to seek help online or from a friend with more woodworking experience.

Q: How do I make sure the chaise lounge is sturdy and safe?

A: Use high-quality materials and secure all joints with strong screws or bolts. Pre-drill pilot holes in wood to prevent splitting. Check for squareness and levelness throughout the build process. Always test the stability before using it.

Happy building!

Share:

Affordable chaise lounge woodworking projects for home improvement

Affordable Chaise Lounge Woodworking Projects for Your Home

Hey there, fellow DIY enthusiasts! So you're dreaming of a luxurious chaise lounge to relax in after a long day, but the price tags at furniture stores are making your wallet weep? Don't worry, you're not alone! Building your own chaise lounge is totally achievable, even on a budget. This guide will walk you through creating a comfortable and stylish chaise lounge without breaking the bank. Let's dive in!

Choosing Your Wood and Design

The first step to any successful woodworking project is choosing the right materials. For an affordable chaise lounge, you'll want to consider cost-effective yet sturdy wood options. Pine is a classic choice â€" it's relatively inexpensive, easy to work with, and readily available at most lumber yards. Fir is another excellent option, offering similar workability and affordability. If you want something a bit more durable, consider cedar, although it'll be slightly more expensive.

Now, let's talk design. You don't need to be a professional designer to create a beautiful chaise lounge. Start with simple designs. A clean, straight-lined chaise is easier to build than something with intricate curves. You can find plenty of free plans online, or even sketch your own design based on what you envision. Remember, this is YOUR project, so personalize it!

Simple Chaise Lounge Designs

Here are a few ideas to get your creative juices flowing:

  • The Classic Straight Chaise: This is the easiest to build. It essentially involves creating a long, slightly reclined seat with legs. Simple, elegant, and perfect for beginners.
  • The A-Frame Chaise: This design uses a simple A-frame structure for support, giving it a slightly more modern feel. It's a bit more challenging but still manageable for intermediate DIYers.
  • The Pallet Chaise: If you're looking for the ultimate budget option, repurposing wooden pallets is a fantastic way to go. You'll need to carefully disassemble and clean the pallets, but the cost savings are significant!

Gathering Your Tools and Materials

Before you even think about cutting wood, make sure you have all the necessary tools and materials. This will save you time and frustration in the long run. You'll likely need:

  • Wood: Pine, fir, cedar, or repurposed pallets, depending on your chosen design and budget.
  • Measuring Tape and Pencil: Essential for accurate cuts.
  • Circular Saw or Hand Saw: For cutting the wood to size. A circular saw is faster, but a hand saw works perfectly fine.
  • Drill and Drill Bits: For creating pilot holes before screwing in fasteners.
  • Screws: Choose exterior-grade screws for durability.
  • Sandpaper: Various grits for smoothing out the wood.
  • Wood Glue: For extra strength and stability in joints.
  • Clamps: To hold pieces together while the glue dries.
  • Safety Glasses and Dust Mask: Always prioritize safety!
  • Wood Stain or Paint (Optional): To add color and protection to your chaise lounge.
  • Cushions and Upholstery (Optional): For added comfort.

Step-by-Step Construction Guide (Simplified)

The exact steps will vary depending on your chosen design, but here's a general overview of the process:

  1. Cut the Wood: Carefully measure and cut all the wood pieces according to your plan. Remember to account for the angle of the backrest if your design calls for it.
  2. Assemble the Frame: Use wood glue and screws to join the pieces together. Make sure all joints are secure and aligned.
  3. Sand the Wood: Once the frame is assembled, thoroughly sand all surfaces to remove any splinters or rough edges. Start with a coarser grit sandpaper and gradually move to finer grits.
  4. Apply Finish (Optional): Apply wood stain or paint according to the manufacturer's instructions. Let it dry completely before adding cushions.
  5. Add Cushions (Optional): Choose comfortable cushions that complement your chaise lounge’s style. You can even sew your own for a truly personalized touch.

Tips for Keeping Costs Down

Here are some clever ways to make your chaise lounge project even more budget-friendly:

  • Source reclaimed wood: Look for free or inexpensive wood from demolition sites, construction sites, or even your own backyard (if you have any suitable lumber).
  • Shop for sales: Keep an eye out for sales on lumber and hardware at your local home improvement stores.
  • Use simple joinery techniques: Avoid complex joinery techniques that require specialized tools. Simple butt joints and screws are perfectly sufficient for a sturdy chaise lounge.
  • Buy in bulk: If you're purchasing new lumber, buying in bulk can often result in lower prices per board foot.
  • Repurpose existing materials: Get creative and see what you can repurpose from around your house. Old pallets, discarded planks, or even sturdy crates could all be incorporated into your design.

Frequently Asked Questions

Q: How long does it take to build a chaise lounge?

A: This depends entirely on your chosen design and your experience level. A simple design might take a weekend, while a more complex design could take several days or even a week.

Q: What kind of finish should I use?

A: Exterior-grade wood stain or paint is recommended to protect the wood from the elements, especially if you plan to use your chaise lounge outdoors.

Q: Can I build a chaise lounge without any woodworking experience?

A: Yes! Start with a simple design and follow detailed plans carefully. There are plenty of beginner-friendly projects available online. Don't be afraid to ask for help from more experienced woodworkers if needed!

Q: What if I make a mistake?

A: Don’t panic! Woodworking is a learning process. Mistakes happen. Often, minor errors can be easily corrected with sandpaper or by adjusting your cuts. For bigger mistakes, you might need to rethink a certain element of the design.

Q: Where can I find free plans?

A: You can find many free chaise lounge plans on websites like Pinterest, Instructables, and Ana White. Just remember to choose plans that match your skill level.

So there you have it! Building your own chaise lounge is a rewarding and achievable project. With a little planning, patience, and creativity, you can create a beautiful and comfortable piece of furniture that you’ll enjoy for years to come. Happy building!

Share:

DIY folding picnic table plans for convenience

Build Your Own Super-Convenient Folding Picnic Table!

Hey there, fellow outdoor enthusiasts! Tired of lugging around bulky picnic tables or settling for wobbly, uncomfortable alternatives? I've got you covered. This guide will walk you through building your own DIY folding picnic table â€" one that's both sturdy and surprisingly easy to transport. We'll build this thing together, step by step, so don't worry if you're not a seasoned carpenter. Even if your woodworking experience is limited to assembling flat-pack furniture, you'll be amazed at what you can accomplish!

Planning Your Perfect Folding Picnic Table

Before we dive into the nitty-gritty of construction, let's talk about planning. This isn’t just about grabbing some wood and hoping for the best; a little pre-planning goes a long way. We need to determine the size, the materials, and the overall style.

Choosing the Right Dimensions

Think about how many people you usually entertain at your picnics. A table for two will obviously be smaller than one for six. Consider the space you'll have to store the table when it's folded â€" a smaller table is easier to store, but it might not be as comfy. I recommend starting with a table that's roughly 4 feet long and 2.5 feet wide. This is a good balance between practicality and portability. You can adjust these dimensions to fit your specific needs, of course.

Material Selection: Wood vs. Metal

This is a big decision. Wood offers a natural, rustic aesthetic and is generally easier to work with for beginners. Pressure-treated lumber is a good choice for outdoor durability, though you'll want to seal it to extend its life. Metal, on the other hand, is incredibly strong and durable, but it can be more challenging to work with and requires specific tools (like a welder, possibly).

For this guide, we'll focus on a wood construction, as it's more beginner-friendly. However, the principles can be adapted for a metal frame.

Design Considerations: Simple vs. Fancy

We’re aiming for convenience here, so let's keep the design simple. A basic rectangular table with a simple folding mechanism is perfect. We'll avoid complex joints and intricate designs to make the build as straightforward as possible. Once you master the basics, you can always experiment with fancier designs later!

Gathering Your Materials and Tools

Alright, let’s get down to the nitty-gritty! Here's what you'll need for your DIY folding picnic table:

  • Pressure-treated lumber (2x4s and 2x6s â€" quantities depend on your chosen dimensions)
  • Wood screws (various lengths)
  • Exterior wood glue
  • Wood stain or sealant (optional, but highly recommended for outdoor use)
  • Hinges (heavy-duty, at least 2)
  • Latch or clasp (to secure the table when folded)
  • Measuring tape
  • Saw (circular saw or hand saw)
  • Drill with drill bits
  • Screwdriver
  • Level
  • Safety glasses
  • Sandpaper (optional, for smoothing edges)

Tip: Buy all your lumber at once from the same store to ensure consistent quality and color.

Step-by-Step Construction Guide

This is where the fun begins! Remember to always prioritize safety. Wear safety glasses and take your time. Precision is key for a sturdy and smoothly operating table.

Building the Tabletop

Cut your 2x6s to the desired length for your tabletop. Assemble them side-by-side, leaving a small gap between them for expansion and contraction due to weather. Secure them together using wood glue and screws. Ensure that the tabletop is perfectly square and level.

Constructing the Legs and Supports

For the legs, cut four 2x4s to the desired height. Cut additional 2x4s to serve as supports for the folding mechanism. These supports will connect the legs to the tabletop. The exact cuts will depend on your design and dimensions. Pay close attention to your measurements here to ensure everything lines up correctly.

Attaching the Hinges and Folding Mechanism

This is the crucial part. Attach heavy-duty hinges to the underside of the tabletop and to the support pieces that are connected to the legs. The hinges should allow the tabletop to fold down neatly against the legs. Make sure the hinges are strong enough to support the weight of the tabletop when it’s loaded. Consider using two hinges per side for added security.

Adding the Latch

Once the hinges are in place, attach a secure latch or clasp to keep the table firmly folded when not in use. You can find a variety of latches at most hardware stores â€" choose one that's suitable for outdoor use and fits the design of your table.

Finishing Touches

Sand down any rough edges to make the table smoother and safer. Apply a wood stain or sealant to protect the wood from the elements and enhance its appearance. Let the sealant dry completely before using your new picnic table.

Tips for Success

Here are a few extra tips to help you along the way:

  • Pre-drill pilot holes before screwing anything together. This will prevent the wood from splitting.
  • Use a level frequently to ensure everything is square and straight.
  • Don’t rush the process. Take your time and double-check your measurements.
  • Consider adding a carrying handle to the side for easier transportation.

Frequently Asked Questions

Q: What kind of wood should I use?

A: Pressure-treated pine or cedar are excellent choices for outdoor use. They're relatively inexpensive and durable.

Q: How much does this project cost?

A: The cost will vary depending on the size of your table and the price of lumber in your area. You can expect to spend anywhere from $50 to $150.

Q: Can I make this table larger?

A: Absolutely! Just adjust the dimensions and the amount of lumber accordingly. You might need stronger hinges and a more robust folding mechanism for a larger table.

Q: What if my table is wobbly?

A: Check to make sure all the legs are the same length and that they’re firmly attached to the supports. You may need to add shims under the legs to level the table.

Q: Can I paint the table instead of staining it?

A: Yes, you can paint your table. Just make sure to use an exterior-grade paint that's designed to withstand the elements.

There you have it! Your very own DIY folding picnic table. Enjoy those outdoor adventures with your new creation. Happy building!

Share:

Cantilever pergola plans for creating open and airy spaces

Cantilever Pergola Plans for Creating Open and Airy Spaces

Cantilever pergolas represent a sophisticated approach to outdoor living, offering a unique blend of architectural elegance and functional shade. Unlike traditional pergolas supported by posts at each corner, cantilever pergolas utilize a system of cantilevered beams, creating a floating, open aesthetic that maximizes the feeling of spaciousness. This comprehensive guide delves into the design, construction, and considerations involved in building your own cantilever pergola, allowing you to transform your outdoor space into a haven of airy sophistication.

Design Considerations: Achieving Architectural Harmony

Before embarking on the construction process, meticulous planning is paramount. The design phase dictates the overall success and aesthetic appeal of your cantilever pergola. Several key considerations must be addressed to ensure the structure is both visually appealing and structurally sound.

Defining the Scope and Scale

The size and dimensions of your cantilever pergola will significantly impact its overall impact and functionality. Consider the available space, the intended use (dining, relaxation, etc.), and the surrounding landscape architecture. A larger pergola might be suitable for expansive gardens, while a smaller structure might be more appropriate for a patio or deck. Accurate measurements are essential to avoid costly mistakes during the construction phase.

Material Selection: Balancing Aesthetics and Durability

The choice of materials significantly influences the longevity and aesthetic appeal of your cantilever pergola. Popular options include:

  • Wood: Offers a classic, warm aesthetic and can be stained or painted to complement your existing landscape. Pressure-treated lumber is recommended for enhanced durability against rot and insect infestation.
  • Aluminum: A low-maintenance option that is lightweight, strong, and resistant to corrosion. Powder-coated finishes provide a wide range of color choices.
  • Steel: Provides exceptional strength and durability, making it ideal for large or complex designs. However, steel requires regular maintenance to prevent rust and corrosion.

The selected material will influence the overall design, structural calculations, and the required fastening systems. Careful consideration should be given to the inherent properties of each material to ensure structural integrity.

Integrating the Pergola into its Surroundings

The cantilever pergola should seamlessly integrate with its surrounding environment. Consider the existing architectural style of your home and other structures. Maintaining a cohesive design palette, employing similar materials or color schemes, will ensure the pergola enhances rather than detracts from the overall aesthetic. The surrounding landscaping should also be considered; plants and other features should complement the pergola’s design and not compete for visual attention.

Structural Engineering: Ensuring Stability and Longevity

The cantilever design, while aesthetically pleasing, presents unique structural challenges. The absence of intermediate supports requires careful calculation of beam spans, load-bearing capacity, and anchoring mechanisms. To avoid structural failure, professional engineering advice is highly recommended, especially for larger or more complex designs.

Calculating Load Bearing Capacity

Accurate calculation of the load-bearing capacity of the cantilever beams is crucial. This involves considering the weight of the pergola itself, the anticipated snow load (in relevant climates), and any additional loads, such as seating, plants, or other adornments. Using appropriate engineering software or consulting with a structural engineer will ensure the structure can safely withstand these loads.

Anchoring and Support Systems

The cantilever beams require robust anchoring systems to transfer the load to the ground or a supporting structure. The chosen anchoring method will depend on the material of the pergola, the soil conditions, and the overall design. Common anchoring techniques include deep foundation footings, concrete piers, or bolting to existing structures. The selection and implementation of these systems should be carefully planned and executed by qualified professionals to guarantee structural stability and prevent failure.

Selecting Appropriate Beam Sizes and Materials

The size and material of the cantilever beams are determined by the calculated load-bearing requirements and the overall span. Larger spans will require larger, stronger beams. Professional engineering calculations should guide the selection of appropriate materials and dimensions to ensure structural integrity and longevity. Properly sized beams will guarantee the stability and safety of the structure over time, resisting potential damage from environmental factors or excessive loading.

Construction Techniques: A Step-by-Step Guide

The construction process requires meticulous attention to detail and adherence to safe work practices. While specific techniques vary based on the chosen design and materials, the general steps remain consistent.

Foundation Preparation

A solid foundation is essential for a stable and long-lasting cantilever pergola. This involves excavating, pouring concrete footings or piers, and allowing sufficient curing time before proceeding with the installation of the supporting structure. The quality of the foundation directly impacts the overall stability and lifespan of the pergola.

Framing and Beam Installation

The framing system consists of the main cantilever beams, supporting posts (if any), and any additional bracing or cross-members. Precise measurements and proper alignment are critical to ensure structural integrity. The chosen fastening methods, whether bolts, screws, or welds, must be appropriate for the selected materials and load-bearing requirements. Accurate installation of the beams is vital for the structural performance of the pergola.

Roofing and Finishing Touches

The final stage involves installing the roofing material, which can range from latticework to solid panels, depending on the desired level of shade and privacy. Finishing touches, such as painting, staining, or sealing, protect the pergola from the elements and enhance its aesthetic appeal. The final finishing ensures both the longevity and aesthetic quality of the project, protecting it from weather damage and enhancing its visual appeal.

Conclusion: Enjoying Your Open and Airy Space

Building a cantilever pergola is a rewarding project that transforms outdoor spaces into elegant and functional extensions of the home. By carefully considering the design, engaging professional expertise where necessary, and meticulously following construction techniques, you can create a striking structure that offers shade, enhances privacy, and adds significant value to your property. The resulting open and airy space provides a perfect setting for relaxation, entertaining, or simply enjoying the beauty of the outdoors.

Share:

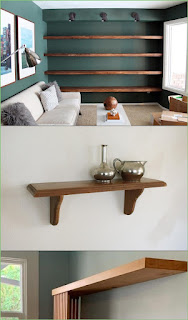
How to make a wooden wall shelf with stylish design

Craft a Chic Wooden Wall Shelf: A Step-by-Step Guide

Tired of cluttered surfaces and a lack of stylish storage? Building your own wooden wall shelf offers a rewarding DIY project that perfectly blends functionality with personalized design. This guide walks you through creating a stunning, unique shelf, tailored to your aesthetic. Prepare to transform a blank wall into a stylish focal point!

Choosing Your Wood and Design

The journey begins with selecting the perfect wood. Consider the overall style of your room. Reclaimed wood offers rustic charm and unique character, while smooth, finished hardwoods like maple or oak provide a more contemporary look. Think about the color and grainâ€"will it complement existing furniture or create a striking contrast? Once you've chosen your wood, sketch out your design. Do you envision a single, long shelf, or a series of smaller, tiered shelves? Will it be minimalist and sleek, or feature intricate curves and details? Consider the weight it will hold and choose dimensions accordingly. A simple straight shelf is a great beginner project, while more complex designs will challenge your woodworking skills.

Gathering Your Materials and Tools

Before you begin, gather all your materials and tools. This minimizes interruptions during construction. You'll need:

  • Your chosen wood (consider thickness for stability)
  • Wood screws (appropriate length for your shelf thickness and wall type)
  • Wall anchors (if necessary, depending on your wall type and shelf weight)
  • Wood glue
  • Sandpaper (various grits for smoothing)
  • Wood stain or paint (optional, for a finished look)
  • Measuring tape
  • Pencil
  • Saw (circular saw or hand saw)
  • Drill with drill bits (to pilot holes for screws)
  • Level
  • Safety glasses

Remember safety first! Always wear safety glasses when using power tools.

Constructing Your Shelf

Cutting the Wood

Accurately measure and cut your wood to your desired dimensions using your saw. For a straight shelf, this is a simple cut. More complex designs may require multiple cuts and careful attention to angles. Always measure twice and cut once to avoid mistakes.

Sanding and Finishing

Once cut, thoroughly sand all surfaces to achieve a smooth finish. Start with a coarser grit sandpaper and progressively move to finer grits for a polished look. This step significantly enhances the shelf's appearance and prevents splinters. If desired, apply wood stain or paint according to the manufacturer's instructions, allowing ample drying time between coats.

Attaching Brackets or Supports

For added support and a stylish design, consider using decorative brackets. These are available in various styles, from simple metal brackets to ornate wooden ones. Securely attach the brackets to the shelf and the wall using screws and wall anchors (if needed) ensuring proper leveling throughout the process.

Installing Your Stunning Shelf

Locate the studs in your wall using a stud finder to ensure secure attachment. Mark the locations of your brackets on the wall, using a level to maintain a straight line. Pre-drill pilot holes to prevent wood splitting, then carefully attach your brackets to the wall. Finally, carefully mount the shelf onto the brackets, making sure it's level and secure. Admire your handiworkâ€"you’ve successfully created a stylish and functional addition to your home!

Share:

Postingan Populer

Search This Blog

Powered by Blogger.

Arsip Blog

Recent Posts

Pages