Craft a Chic Wooden Wall Shelf: A Step-by-Step Guide
Tired of cluttered surfaces and a lack of stylish storage? Building your own wooden wall shelf offers a rewarding DIY project that perfectly blends functionality with personalized design. This guide walks you through creating a stunning, unique shelf, tailored to your aesthetic. Prepare to transform a blank wall into a stylish focal point!
Choosing Your Wood and Design
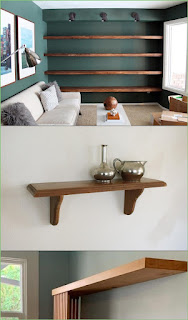
The journey begins with selecting the perfect wood. Consider the overall style of your room. Reclaimed wood offers rustic charm and unique character, while smooth, finished hardwoods like maple or oak provide a more contemporary look. Think about the color and grainâ€"will it complement existing furniture or create a striking contrast? Once you've chosen your wood, sketch out your design. Do you envision a single, long shelf, or a series of smaller, tiered shelves? Will it be minimalist and sleek, or feature intricate curves and details? Consider the weight it will hold and choose dimensions accordingly. A simple straight shelf is a great beginner project, while more complex designs will challenge your woodworking skills.
Gathering Your Materials and Tools
Before you begin, gather all your materials and tools. This minimizes interruptions during construction. You'll need:
- Your chosen wood (consider thickness for stability)
- Wood screws (appropriate length for your shelf thickness and wall type)
- Wall anchors (if necessary, depending on your wall type and shelf weight)
- Wood glue
- Sandpaper (various grits for smoothing)
- Wood stain or paint (optional, for a finished look)
- Measuring tape
- Pencil
- Saw (circular saw or hand saw)
- Drill with drill bits (to pilot holes for screws)
- Level
- Safety glasses
Remember safety first! Always wear safety glasses when using power tools.
Constructing Your Shelf
Cutting the Wood
Accurately measure and cut your wood to your desired dimensions using your saw. For a straight shelf, this is a simple cut. More complex designs may require multiple cuts and careful attention to angles. Always measure twice and cut once to avoid mistakes.
Sanding and Finishing
Once cut, thoroughly sand all surfaces to achieve a smooth finish. Start with a coarser grit sandpaper and progressively move to finer grits for a polished look. This step significantly enhances the shelf's appearance and prevents splinters. If desired, apply wood stain or paint according to the manufacturer's instructions, allowing ample drying time between coats.
Attaching Brackets or Supports
For added support and a stylish design, consider using decorative brackets. These are available in various styles, from simple metal brackets to ornate wooden ones. Securely attach the brackets to the shelf and the wall using screws and wall anchors (if needed) ensuring proper leveling throughout the process.
Installing Your Stunning Shelf
Locate the studs in your wall using a stud finder to ensure secure attachment. Mark the locations of your brackets on the wall, using a level to maintain a straight line. Pre-drill pilot holes to prevent wood splitting, then carefully attach your brackets to the wall. Finally, carefully mount the shelf onto the brackets, making sure it's level and secure. Admire your handiworkâ€"you’ve successfully created a stylish and functional addition to your home!


No comments:
Post a Comment
Note: Only a member of this blog may post a comment.