Custom desk woodworking plans for crafting a unique workstation

Building Your Dream Desk: A Custom Woodworking Project

So, you're thinking about building a custom desk? Awesome! There's nothing quite like the satisfaction of crafting something beautiful and functional with your own two hands. And a desk? That's a piece of furniture you'll use every single day. This isn't just a project; it's an investment in your comfort and workspace. Let's dive into making your dream desk a reality!

Planning Your Perfect Desk: Size, Style, and Materials

Before you even touch a saw, you need a solid plan. This isn’t about grabbing some lumber and hoping for the best. We’re talking about precision and personalization. The first step is figuring out exactly what you need from your desk.

Measuring Your Space and Needs

Grab a tape measure and head to where your desk will live. How much space do you actually have? Don't just eyeball it â€" measure the width, depth, and any obstructions (like radiators or windows). Consider how much space you need for your computer, keyboard, monitor(s), paperwork, and any other essentials. Do you need extra drawers, shelves, or a monitor riser? Draw a quick sketch with your measurements â€" it’ll be invaluable later.

Choosing Your Style

What kind of vibe are we going for? Modern minimalist? Rustic farmhouse charm? Industrial chic? Your desk's style should complement the overall aesthetic of your room. Browse online for inspiration â€" Pinterest is your friend! Consider the type of wood: oak for a classic look, walnut for a rich, dark tone, maple for a lighter, brighter feel, or pine for a more rustic appeal. Each has its own unique character and workability.

Selecting Your Materials

Beyond the wood itself, you'll need to consider other materials. Will you use metal legs? How about a glass top? Perhaps some built-in cable management? Think about the durability and longevity you want from your desk. Hardwoods are generally more durable than softwoods, but they also come with a higher price tag. Consider your budget and how much time you're willing to spend on the project.

Gathering Your Tools and Materials

Now for the fun part â€" gathering your supplies! Don't worry if you don't have every single tool listed. You can often rent specialized equipment from tool rental stores. However, having a well-stocked workshop definitely speeds things along.

Essential Tools

  • Measuring Tape
  • Pencil
  • Circular Saw or Table Saw
  • Miter Saw (for angled cuts)
  • Drill
  • Screwdriver (both Phillips and flathead)
  • Clamps
  • Sandpaper (various grits)
  • Wood Glue
  • Wood Finish (stain, varnish, polyurethane â€" your choice!)
  • Safety Glasses
  • Hearing Protection
  • Dust Mask

Materials List (Example)

This is a *sample* list; your exact needs will vary depending on your design:

  • Wood boards (adjust quantity and dimensions to your plan)
  • Wood screws
  • Dowels (optional, for extra strength)
  • Wood filler
  • Legs (wood or metal)
  • Casters (optional)
  • Drawer slides (if adding drawers)

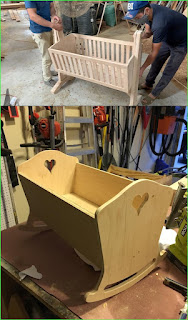
Construction: Building Your Desk

This is where the real woodworking begins! Refer back to your detailed plan constantly. Take your time, be precise, and don’t rush the process. Accuracy in this stage will pay off massively in the end.

Cutting the Wood

Carefully cut your wood according to your measurements. Double-check your cuts before moving on to the next step. Use appropriate safety gear â€" safety glasses and hearing protection are must-haves!

Assembling the Desk

Use wood glue and screws to join the pieces together. Clamps will help keep everything aligned while the glue dries. If you’re using dowels, pre-drill pilot holes to prevent splitting the wood.

Sanding and Finishing

Once the desk is assembled, it's time for sanding. Start with a coarser grit sandpaper and gradually move to finer grits to achieve a smooth surface. After sanding, apply your chosen finish. Follow the manufacturer's instructions carefully. Multiple thin coats are better than one thick coat.

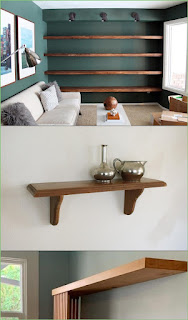
Adding Personal Touches

This is your chance to make your desk truly unique! Consider these fun additions:

  • Built-in cable management: Drill holes or create channels to keep your wires tidy.
  • Drawers or shelves: Add extra storage space to keep your workspace organized.
  • Customizable features: Incorporate a monitor riser, keyboard tray, or other ergonomic features.
  • Unique hardware: Choose knobs and pulls that complement your desk's style.
  • Inlays or decorative elements: Add a personal touch with wood inlays, etched designs, or other decorative elements.

Frequently Asked Questions

Here are some common questions I get about building custom desks:

How long does it take to build a custom desk?

It depends on the complexity of the design and your experience level. A simple desk might take a weekend, while a more elaborate one could take several weeks.

How much does it cost to build a custom desk?

The cost varies greatly depending on the materials you choose. Hardwoods are more expensive than softwoods, and adding features like drawers or intricate designs will increase the cost.

What if I don't have all the tools?

Many tools can be rented from home improvement stores or tool rental shops. Alternatively, you can consider partnering with a friend who has the necessary equipment.

What type of wood is best for a desk?

Hardwoods like oak, maple, and walnut are durable and long-lasting but can be more expensive. Softwoods like pine are more affordable but may require more maintenance.

Can I build a desk without any woodworking experience?

Yes, but start with a simpler design. There are plenty of beginner-friendly plans available online. Take your time, follow instructions carefully, and don't be afraid to ask for help.

Building a custom desk is a rewarding experience that allows you to create a truly personalized workspace. Remember to plan carefully, gather the right tools, and most importantly, enjoy the process!

Share:

Elegant buffet woodworking projects for formal dining rooms

Crafting Elegance: Exquisite Buffet Woodworking Projects for the Formal Dining Room

The formal dining room, a space dedicated to refined gatherings and cherished memories, deserves furniture that reflects its grandeur. A handcrafted buffet, far from being mere storage, becomes a centerpiece, a testament to artistry and meticulous craftsmanship. This article explores the design and construction of several elegant buffet woodworking projects, perfect for enhancing the sophistication of your formal dining room. We’ll delve into the selection of woods, intricate detailing, and finishing techniques that elevate these pieces from functional furniture to stunning works of art.

Choosing the Right Wood: A Foundation of Elegance

The heart of any successful buffet project lies in the wood selection. Hardwoods, renowned for their durability and rich grain patterns, are the preferred choice for formal dining room pieces. Consider the timeless appeal of mahogany, with its deep reddish-brown hues and lustrous finish. Its inherent elegance lends itself beautifully to traditional styles. Alternatively, cherry offers a warm, mellow tone that ages gracefully, developing a richer patina over time. For a more contemporary feel, walnut's striking dark brown grain and subtle figuring can create a dramatic statement. The chosen wood not only impacts the visual aesthetic but also influences the workability and overall cost of the project. Before commencing, carefully evaluate the wood's characteristics, considering its density, grain orientation, and susceptibility to warping or cracking.

Designing Your Dream Buffet: Style and Functionality

The design phase is crucial. Begin by considering your existing dining room décor and personal style preferences. Do you favor classic, traditional designs, or a more modern aesthetic? Will the buffet primarily serve as storage or also feature display space? Sketch preliminary designs, experimenting with different proportions and configurations. Consider incorporating elements such as:

  • Intricate carvings: Delicate acanthus leaf carvings, or more geometric patterns, add a touch of opulence.
  • Detailed inlay work: Using contrasting wood species or other materials like mother-of-pearl can create stunning visual accents.
  • Elegant hardware: Choose high-quality pulls and knobs that complement the overall design, avoiding anything too flashy or modern.
  • Glass-fronted cabinets: Showcase fine china or glassware through carefully integrated glass panels.
  • Built-in wine storage: Add a specialized section for storing wine bottles, enhancing both functionality and style.

Remember that even subtle design choices can dramatically impact the overall impression. A well-thought-out design ensures both form and function are harmoniously integrated.

Construction Techniques: Precision and Patience

Constructing a buffet requires meticulous attention to detail. Precise joinery techniques are essential for creating a strong and stable piece. Dovetail joints, renowned for their strength and beauty, are a classic choice for drawers and casework. Consider using mortise and tenon joints for frame construction, ensuring durability and a clean, elegant look. Utilize high-quality woodworking tools and clamps to maintain accuracy and consistency throughout the construction process. Take your time; rushing can lead to errors that are difficult, if not impossible, to correct later. Pay close attention to detail in every step, from cutting the wood to assembling the final components.

Finishing Touches: Enhancing the Elegance

The final stage elevates your handcrafted buffet to its full potential. Careful sanding is essential to achieve a smooth, flawless surface. Then, apply several coats of a high-quality finish that enhances the wood's natural beauty. A hand-rubbed oil finish offers a warm, subtle sheen, while a lacquer finish provides a more durable and glossy protection. Consider using a stain to deepen the wood's color or to achieve a specific hue. Remember, the finishing process is as crucial as the construction itself; it’s the final touch that transforms a well-built piece into a true heirloom.

With careful planning, precision craftsmanship, and a touch of artistic flair, you can create a stunning buffet that will be the focal point of your formal dining room for generations to come. The process, while demanding, is immensely rewarding, resulting in a piece that reflects both your skill and your discerning taste.

Share:

How to make a cradle with durable and natural materials

Building a Cradle: A Natural & Durable DIY Project

So, you're thinking about building a cradle for your little one? That's wonderful! There's something incredibly special about crafting something yourself, especially something so precious as a baby's cradle. And using natural materials? Even better! This project isn't for the faint of heart â€" it requires some woodworking skills â€" but with a little patience and the right instructions, you can create a beautiful, sturdy, and safe cradle that will become a family heirloom.

Choosing Your Materials: Natural and Strong

The key to a durable cradle is selecting the right wood. You want something strong, but also relatively lightweight and easy to work with. Avoid anything treated with harsh chemicals, as those are definitely not baby-friendly. Here are some excellent options:

  • Hardwood: Think oak, maple, cherry, or walnut. These are strong, long-lasting, and beautiful. They might be a bit pricier, but the quality and longevity are worth it.
  • Softwood (with caution): Pine, for example, is a softer wood and requires extra care to ensure durability and safety. You'll need to select planks free of knots and use thicker pieces.
  • Plywood (Birch or Poplar): Plywood can be a good option for certain parts of the cradle, particularly the base, providing strength without excessive weight. Make sure it’s a high-quality, formaldehyde-free plywood.

Beyond the wood, consider these:

  • Non-toxic finish: Absolutely crucial! You'll want a finish that is completely safe for your baby. Look for water-based, non-toxic sealants, specifically designed for children's furniture. Linseed oil is a natural option but requires several coats and regular maintenance.
  • Natural fiber mattress: Choose a mattress specifically designed for cribs and cradles, made from natural materials like organic cotton or wool. Avoid anything synthetic.
  • Natural rope or webbing for the suspension (if using a rocking cradle): Avoid anything that could fray or break easily.

Designing Your Cradle: Simple is Best

Don't overcomplicate things! A simple, classic cradle design is often the safest and easiest to build. Sketch out your design first. Consider these basic elements:

  • Base: A sturdy, flat base that will support the mattress.
  • Sides: These will need to be high enough to prevent the baby from rolling out, but not so high that they're difficult to access.
  • Headboard and Footboard: These can be simple or more elaborate, depending on your woodworking skills and aesthetic preferences. They should be securely attached to the sides.
  • Rocking mechanism (optional): If you want a rocking cradle, you'll need to incorporate a sturdy rocking base or curved supports.

Important safety note: The spacing between the slats or bars on the sides must meet safety standards to prevent your baby from getting their head or limbs stuck. Research these standards carefully before you begin.

Construction: Step-by-Step Guide (Simplified)

This is a highly simplified overview. A complete guide would require extensive diagrams and detailed measurements. For detailed instructions, consider consulting woodworking plans specifically designed for cradles.

Cutting and Preparing the Wood:

Carefully cut your wood according to your design. Sand all pieces thoroughly to remove any splinters or rough edges. This is a critical step for baby safety!

Assembling the Frame:

This typically involves joining the base, sides, headboard, and footboard. Use strong wood glue and appropriate joinery techniques (like mortise and tenon or dowel joints) for a secure and durable construction. Clamps are your friend here!

Adding the Slats or Panels:

Securely attach the slats or panels to the sides, maintaining the required spacing for safety. Use screws or strong wood glue, depending on your design and the type of wood you are using.

Finishing Touches:

Once the cradle is assembled, sand all surfaces again to ensure smoothness. Apply your chosen non-toxic finish following the manufacturer's instructions. Allow ample drying time between coats.

Adding the Rocking Mechanism (If Applicable):

If you’re making a rocking cradle, carefully attach the rocking base or curved supports, ensuring they are securely fastened and balanced. Test it thoroughly before placing your baby in it.

Safety First! Absolutely Essential Considerations

This is perhaps the most important section. Building a cradle is not just about aesthetics; it's about ensuring the safety of your precious little one. Consider these critical points:

  • Stability: The cradle should be incredibly stable. Test it rigorously to ensure it doesn't wobble or tip easily.
  • Spacing: Meet all applicable safety standards regarding slat spacing to prevent your baby from becoming trapped.
  • Hardware: Use high-quality screws, bolts, and other hardware specifically designed for furniture making. Avoid anything that could easily come loose or present a choking hazard.
  • Mattress Fit: The mattress should fit snugly within the cradle frame to prevent the baby from rolling into the gap between the mattress and the sides.
  • No sharp edges or corners: Sand everything meticulously and round off any sharp edges or corners.
  • Regular Inspection: Inspect the cradle regularly for any signs of wear and tear or loose components.

Frequently Asked Questions

  • How long does it take to build a cradle? This varies greatly depending on your experience, the complexity of the design, and the amount of time you can dedicate to the project. Expect to spend several days, perhaps even weeks, if you're a beginner.
  • Is it cheaper to build a cradle than to buy one? It depends on the cost of materials and your labor value. If you already have many of the necessary tools, it could be cheaper. However, the time investment should be considered.
  • What if I make a mistake? Don't panic! Woodworking involves imperfections. If you make a mistake, try to fix it carefully. Sometimes you might need to start again with a specific piece.
  • Can I use reclaimed wood? Potentially, but be extremely cautious! Make sure the wood is clean, free from harmful chemicals, and free of splinters. Proper sanding and sealing are crucial.
  • Where can I find plans? There are many woodworking plans online and in books. Search for "DIY cradle plans" or "natural wood cradle plans".

Building a cradle is a labour of love. It requires dedication, skill, and attention to detail. But the result â€" a beautiful, safe, and uniquely crafted cradle for your baby â€" is an incredibly rewarding experience. Remember to prioritize safety above all else, and enjoy the process!

Share:

Affordable cradle woodworking plans for DIY enthusiasts

Rock-a-Bye Baby: Affordable Cradle Woodworking Plans

Crafting a beautiful and functional cradle for your little one is a rewarding DIY project. Forget the exorbitant prices of store-bought models; with readily available materials and these detailed plans, you can build a cherished heirloom at a fraction of the cost. This guide provides step-by-step instructions and tips to help you create a safe and stunning cradle that will last for generations.

Choosing Your Wood and Tools

The success of your project hinges on selecting the right materials. Pine is an excellent, affordable choice known for its softness and workability. Its smooth surface is gentle on baby’s skin, and its light color provides a blank canvas for personalization. Alternatively, consider basswood for a slightly more durable and slightly more expensive option. Avoid woods that are prone to splintering or contain harmful chemicals. Before you start, gather your essential tools: a circular saw, a jigsaw, sandpaper (various grits), wood glue, clamps, a drill with drill bits (various sizes), screws, and wood finish (non-toxic and baby-safe). A measuring tape, pencil, and safety glasses are also crucial for accurate work and personal safety.

Step-by-Step Construction Guide

Building the Cradle Base

Start by cutting the base pieces to your desired dimensions. The plans below provide specific measurements, but you can adjust them to fit your space and aesthetic preferences. Ensure the base is perfectly square and use wood glue and screws for robust assembly. Remember to pre-drill pilot holes before screwing to avoid splitting the wood. For added stability, consider adding cross-supports underneath the base. Once the glue has dried completely, carefully sand all surfaces to remove any splinters or imperfections.

Constructing the Sides and Headboard

Next, assemble the cradle sides, paying close attention to the angle of the headboard and footboard. These pieces will determine the overall look of your cradle and contribute to its structural integrity. Use the same technique as with the baseâ€"wood glue and screws, pre-drilled pilot holes, and careful sanding. Ensure the sides are securely attached and aligned to create a safe and comfortable sleeping area for your baby.

Adding the Slats and Mattress Support

The slats provide essential ventilation and support for the mattress. Cut these to the correct length and space them evenly across the cradle’s interior. Again, wood glue and screws are your allies. Once the slats are installed, create a support structure for the mattressâ€"this can be simple cross-beams or a more elaborate framework. The mattress support should be firm but allow for slight give.

Finishing Touches and Safety Checks

Once the cradle is structurally complete, it’s time to apply a baby-safe finish. Choose a non-toxic, water-based sealant or paint that is specifically designed for children’s furniture. Apply multiple thin coats, allowing each coat to dry thoroughly before applying the next. Finally, and most importantly, conduct a thorough safety check. Inspect every joint, ensuring all screws are tight and there are no sharp edges or splinters. The cradle should be sturdy, stable, and completely safe for your little one.

Optional Enhancements

Personalize your creation! Consider adding charming details like:

  • Decorative carvings or inlays.
  • A painted design or a soft, neutral stain.
  • Wheels for easy mobility (ensure they are securely attached and lockable).
  • A padded, removable liner for added comfort and easy cleaning.

Remember, building a cradle is a labor of love. Take your time, follow the instructions carefully, and enjoy the process of creating a unique and cherished piece for your baby. The end result will be a beautiful and safe cradle that you’ll proudly display and cherish for years to come.

Share:

Build a chaise lounge with wheels for easy mobility

Building Your Dream Wheeled Chaise Lounge: A DIY Guide

Hey there, fellow comfort seekers! Ever wished you could just effortlessly wheel your relaxation station around the garden, patio, or even inside the house? Well, you’re in luck! This guide will walk you through building your own wheeled chaise lounge, a project that's surprisingly achievable even if you're not a seasoned carpenter. Get ready to get your hands dirty (in a good way!) and create a piece of furniture you'll absolutely adore.

Planning Your Perfect Chaise Lounge

Before we dive into the tools and materials, let's talk about design. The beauty of a DIY project is the customization! Think about where you'll primarily use your chaise lounge. Will it be mostly outdoors, battling the elements? Or will it be an indoor luxury piece? This influences your material choices significantly.

Choosing Your Materials

For the frame, you have several options:

  • Pressure-treated lumber: A great choice for outdoor use, offering durability and resistance to rot and insects. Just make sure to seal it properly to prolong its lifespan.
  • Cedar or redwood: Naturally resistant to rot and decay, these woods are beautiful and require less maintenance than pressure-treated lumber, though they're more expensive.
  • Metal piping (steel or aluminum): A durable and potentially lighter-weight option, especially if you're concerned about weight and mobility. Consider powder coating for weather protection.

For the seating and back support, you can get creative:

  • Outdoor fabric: Durable and weather-resistant, available in a huge array of colors and patterns.
  • Outdoor cushions: Provides plush comfort and can be easily removed for cleaning or storage. Look for quick-drying foam.
  • Rope or webbing: A more rustic and stylish option that requires some experience in weaving or knotting.

Measuring and Sketching

This is crucial! Grab a pencil, paper, and a tape measure. Sketch out your chaise lounge to scale, noting the dimensions of the frame, seating area, back rest, and leg rests. Consider your own height and body proportions for the most comfortable experience. A good starting point is a total length of around 6-7 feet, with a reclining back angle of around 120 degrees.

Gathering Your Tools and Materials

Now for the fun part â€" collecting everything you'll need. This list might seem extensive, but trust me, having everything on hand makes the process so much smoother.

  • Wood/metal for the frame: Based on your chosen material and dimensions.
  • Screws or bolts: Appropriate size and type for your frame material.
  • Saw: Circular saw or hand saw, depending on your comfort level and the materials.
  • Drill: With various drill bits for pilot holes and screwing.
  • Measuring tape and level: Essential for accuracy and ensuring a stable frame.
  • Sandpaper: To smooth any rough edges and splinters.
  • Wood glue (if using wood): For added strength and stability.
  • Clamps: To hold pieces together while the glue dries.
  • Sealer/paint/stain: To protect your frame from the elements (if needed).
  • Fabric/cushions/rope: Your chosen seating material.
  • Staple gun (if using fabric): For attaching fabric to the frame.
  • Wheels (heavy-duty casters): Choose wheels appropriate for the weight of your chaise lounge and the surface you'll be using it on. Look for locking casters for extra safety.
  • Wheel brackets or plates: To securely attach the wheels to the frame.

Constructing the Frame

This is where your design comes to life! Carefully cut your chosen frame materials to the dimensions you've planned. Use wood glue and screws (or bolts) to assemble the frame, ensuring all joints are strong and secure. If using wood, pre-drill pilot holes to prevent splitting. Remember to check for squareness and levelness throughout the process. This is not the time to rush! Take your time and double-check your measurements.

Adding the Wheels

Once the frame is built and sturdy, it's time for the wheels! Attach the wheel brackets or plates to the underside of the frame, making sure they’re evenly spaced and securely fastened. Then, mount your chosen wheels onto the brackets. Test the mobility â€" the chaise lounge should roll smoothly and easily.

Finishing Touches: Seating and Aesthetics

Now comes the part where your chaise lounge really starts to shine! Attach your chosen seating material â€" fabric, cushions, rope â€" to the frame. Use a staple gun for fabric, strong adhesive for cushions, and secure knots for rope. Remember to leave enough space for comfort and avoid bunching or wrinkles.

Once the seating is complete, apply your chosen sealer, paint, or stain to protect your frame. Let it dry completely before using your chaise lounge. If you’re working with wood, sanding down the edges will give it a more professional and smoother finish.

Enjoying Your Creation!

Congratulations! You've built your own custom wheeled chaise lounge. Now, relax, unwind, and enjoy the fruits of your labor. Remember to occasionally inspect your creation for any loose screws, bolts, or worn fabric. A little maintenance goes a long way in prolonging its lifespan.

Commonly Asked Questions

Q: What kind of wheels should I use?

A: Heavy-duty casters are recommended, as they can handle the weight of the chaise lounge and provide smooth rolling. Consider the surface you’ll be using it on â€" outdoor surfaces may require larger, tougher wheels. Locking casters are also a good safety feature.

Q: How much does this project cost?

A: The cost varies greatly depending on the materials you choose. Using reclaimed lumber or less expensive materials can significantly reduce the cost. Expect to spend anywhere from $50 to $300 or more, depending on your choices.

Q: How long does it take to build?

A: The build time can range from a few hours to a couple of days, depending on your experience and the complexity of your design. Don’t rush the process, and take your time to get it right.

Q: Can I build this without prior woodworking experience?

A: Absolutely! This is a manageable project for beginners. Take your time, follow the instructions carefully, and don’t hesitate to seek help online or from a friend with more woodworking experience.

Q: How do I make sure the chaise lounge is sturdy and safe?

A: Use high-quality materials and secure all joints with strong screws or bolts. Pre-drill pilot holes in wood to prevent splitting. Check for squareness and levelness throughout the build process. Always test the stability before using it.

Happy building!

Share:

Affordable chaise lounge woodworking projects for home improvement

Affordable Chaise Lounge Woodworking Projects for Your Home

Hey there, fellow DIY enthusiasts! So you're dreaming of a luxurious chaise lounge to relax in after a long day, but the price tags at furniture stores are making your wallet weep? Don't worry, you're not alone! Building your own chaise lounge is totally achievable, even on a budget. This guide will walk you through creating a comfortable and stylish chaise lounge without breaking the bank. Let's dive in!

Choosing Your Wood and Design

The first step to any successful woodworking project is choosing the right materials. For an affordable chaise lounge, you'll want to consider cost-effective yet sturdy wood options. Pine is a classic choice â€" it's relatively inexpensive, easy to work with, and readily available at most lumber yards. Fir is another excellent option, offering similar workability and affordability. If you want something a bit more durable, consider cedar, although it'll be slightly more expensive.

Now, let's talk design. You don't need to be a professional designer to create a beautiful chaise lounge. Start with simple designs. A clean, straight-lined chaise is easier to build than something with intricate curves. You can find plenty of free plans online, or even sketch your own design based on what you envision. Remember, this is YOUR project, so personalize it!

Simple Chaise Lounge Designs

Here are a few ideas to get your creative juices flowing:

  • The Classic Straight Chaise: This is the easiest to build. It essentially involves creating a long, slightly reclined seat with legs. Simple, elegant, and perfect for beginners.
  • The A-Frame Chaise: This design uses a simple A-frame structure for support, giving it a slightly more modern feel. It's a bit more challenging but still manageable for intermediate DIYers.
  • The Pallet Chaise: If you're looking for the ultimate budget option, repurposing wooden pallets is a fantastic way to go. You'll need to carefully disassemble and clean the pallets, but the cost savings are significant!

Gathering Your Tools and Materials

Before you even think about cutting wood, make sure you have all the necessary tools and materials. This will save you time and frustration in the long run. You'll likely need:

  • Wood: Pine, fir, cedar, or repurposed pallets, depending on your chosen design and budget.
  • Measuring Tape and Pencil: Essential for accurate cuts.
  • Circular Saw or Hand Saw: For cutting the wood to size. A circular saw is faster, but a hand saw works perfectly fine.
  • Drill and Drill Bits: For creating pilot holes before screwing in fasteners.
  • Screws: Choose exterior-grade screws for durability.
  • Sandpaper: Various grits for smoothing out the wood.
  • Wood Glue: For extra strength and stability in joints.
  • Clamps: To hold pieces together while the glue dries.
  • Safety Glasses and Dust Mask: Always prioritize safety!
  • Wood Stain or Paint (Optional): To add color and protection to your chaise lounge.
  • Cushions and Upholstery (Optional): For added comfort.

Step-by-Step Construction Guide (Simplified)

The exact steps will vary depending on your chosen design, but here's a general overview of the process:

  1. Cut the Wood: Carefully measure and cut all the wood pieces according to your plan. Remember to account for the angle of the backrest if your design calls for it.
  2. Assemble the Frame: Use wood glue and screws to join the pieces together. Make sure all joints are secure and aligned.
  3. Sand the Wood: Once the frame is assembled, thoroughly sand all surfaces to remove any splinters or rough edges. Start with a coarser grit sandpaper and gradually move to finer grits.
  4. Apply Finish (Optional): Apply wood stain or paint according to the manufacturer's instructions. Let it dry completely before adding cushions.
  5. Add Cushions (Optional): Choose comfortable cushions that complement your chaise lounge’s style. You can even sew your own for a truly personalized touch.

Tips for Keeping Costs Down

Here are some clever ways to make your chaise lounge project even more budget-friendly:

  • Source reclaimed wood: Look for free or inexpensive wood from demolition sites, construction sites, or even your own backyard (if you have any suitable lumber).
  • Shop for sales: Keep an eye out for sales on lumber and hardware at your local home improvement stores.
  • Use simple joinery techniques: Avoid complex joinery techniques that require specialized tools. Simple butt joints and screws are perfectly sufficient for a sturdy chaise lounge.
  • Buy in bulk: If you're purchasing new lumber, buying in bulk can often result in lower prices per board foot.
  • Repurpose existing materials: Get creative and see what you can repurpose from around your house. Old pallets, discarded planks, or even sturdy crates could all be incorporated into your design.

Frequently Asked Questions

Q: How long does it take to build a chaise lounge?

A: This depends entirely on your chosen design and your experience level. A simple design might take a weekend, while a more complex design could take several days or even a week.

Q: What kind of finish should I use?

A: Exterior-grade wood stain or paint is recommended to protect the wood from the elements, especially if you plan to use your chaise lounge outdoors.

Q: Can I build a chaise lounge without any woodworking experience?

A: Yes! Start with a simple design and follow detailed plans carefully. There are plenty of beginner-friendly projects available online. Don't be afraid to ask for help from more experienced woodworkers if needed!

Q: What if I make a mistake?

A: Don’t panic! Woodworking is a learning process. Mistakes happen. Often, minor errors can be easily corrected with sandpaper or by adjusting your cuts. For bigger mistakes, you might need to rethink a certain element of the design.

Q: Where can I find free plans?

A: You can find many free chaise lounge plans on websites like Pinterest, Instructables, and Ana White. Just remember to choose plans that match your skill level.

So there you have it! Building your own chaise lounge is a rewarding and achievable project. With a little planning, patience, and creativity, you can create a beautiful and comfortable piece of furniture that you’ll enjoy for years to come. Happy building!

Share:

DIY folding picnic table plans for convenience

Build Your Own Super-Convenient Folding Picnic Table!

Hey there, fellow outdoor enthusiasts! Tired of lugging around bulky picnic tables or settling for wobbly, uncomfortable alternatives? I've got you covered. This guide will walk you through building your own DIY folding picnic table â€" one that's both sturdy and surprisingly easy to transport. We'll build this thing together, step by step, so don't worry if you're not a seasoned carpenter. Even if your woodworking experience is limited to assembling flat-pack furniture, you'll be amazed at what you can accomplish!

Planning Your Perfect Folding Picnic Table

Before we dive into the nitty-gritty of construction, let's talk about planning. This isn’t just about grabbing some wood and hoping for the best; a little pre-planning goes a long way. We need to determine the size, the materials, and the overall style.

Choosing the Right Dimensions

Think about how many people you usually entertain at your picnics. A table for two will obviously be smaller than one for six. Consider the space you'll have to store the table when it's folded â€" a smaller table is easier to store, but it might not be as comfy. I recommend starting with a table that's roughly 4 feet long and 2.5 feet wide. This is a good balance between practicality and portability. You can adjust these dimensions to fit your specific needs, of course.

Material Selection: Wood vs. Metal

This is a big decision. Wood offers a natural, rustic aesthetic and is generally easier to work with for beginners. Pressure-treated lumber is a good choice for outdoor durability, though you'll want to seal it to extend its life. Metal, on the other hand, is incredibly strong and durable, but it can be more challenging to work with and requires specific tools (like a welder, possibly).

For this guide, we'll focus on a wood construction, as it's more beginner-friendly. However, the principles can be adapted for a metal frame.

Design Considerations: Simple vs. Fancy

We’re aiming for convenience here, so let's keep the design simple. A basic rectangular table with a simple folding mechanism is perfect. We'll avoid complex joints and intricate designs to make the build as straightforward as possible. Once you master the basics, you can always experiment with fancier designs later!

Gathering Your Materials and Tools

Alright, let’s get down to the nitty-gritty! Here's what you'll need for your DIY folding picnic table:

  • Pressure-treated lumber (2x4s and 2x6s â€" quantities depend on your chosen dimensions)
  • Wood screws (various lengths)
  • Exterior wood glue
  • Wood stain or sealant (optional, but highly recommended for outdoor use)
  • Hinges (heavy-duty, at least 2)
  • Latch or clasp (to secure the table when folded)
  • Measuring tape
  • Saw (circular saw or hand saw)
  • Drill with drill bits
  • Screwdriver
  • Level
  • Safety glasses
  • Sandpaper (optional, for smoothing edges)

Tip: Buy all your lumber at once from the same store to ensure consistent quality and color.

Step-by-Step Construction Guide

This is where the fun begins! Remember to always prioritize safety. Wear safety glasses and take your time. Precision is key for a sturdy and smoothly operating table.

Building the Tabletop

Cut your 2x6s to the desired length for your tabletop. Assemble them side-by-side, leaving a small gap between them for expansion and contraction due to weather. Secure them together using wood glue and screws. Ensure that the tabletop is perfectly square and level.

Constructing the Legs and Supports

For the legs, cut four 2x4s to the desired height. Cut additional 2x4s to serve as supports for the folding mechanism. These supports will connect the legs to the tabletop. The exact cuts will depend on your design and dimensions. Pay close attention to your measurements here to ensure everything lines up correctly.

Attaching the Hinges and Folding Mechanism

This is the crucial part. Attach heavy-duty hinges to the underside of the tabletop and to the support pieces that are connected to the legs. The hinges should allow the tabletop to fold down neatly against the legs. Make sure the hinges are strong enough to support the weight of the tabletop when it’s loaded. Consider using two hinges per side for added security.

Adding the Latch

Once the hinges are in place, attach a secure latch or clasp to keep the table firmly folded when not in use. You can find a variety of latches at most hardware stores â€" choose one that's suitable for outdoor use and fits the design of your table.

Finishing Touches

Sand down any rough edges to make the table smoother and safer. Apply a wood stain or sealant to protect the wood from the elements and enhance its appearance. Let the sealant dry completely before using your new picnic table.

Tips for Success

Here are a few extra tips to help you along the way:

  • Pre-drill pilot holes before screwing anything together. This will prevent the wood from splitting.
  • Use a level frequently to ensure everything is square and straight.
  • Don’t rush the process. Take your time and double-check your measurements.
  • Consider adding a carrying handle to the side for easier transportation.

Frequently Asked Questions

Q: What kind of wood should I use?

A: Pressure-treated pine or cedar are excellent choices for outdoor use. They're relatively inexpensive and durable.

Q: How much does this project cost?

A: The cost will vary depending on the size of your table and the price of lumber in your area. You can expect to spend anywhere from $50 to $150.

Q: Can I make this table larger?

A: Absolutely! Just adjust the dimensions and the amount of lumber accordingly. You might need stronger hinges and a more robust folding mechanism for a larger table.

Q: What if my table is wobbly?

A: Check to make sure all the legs are the same length and that they’re firmly attached to the supports. You may need to add shims under the legs to level the table.

Q: Can I paint the table instead of staining it?

A: Yes, you can paint your table. Just make sure to use an exterior-grade paint that's designed to withstand the elements.

There you have it! Your very own DIY folding picnic table. Enjoy those outdoor adventures with your new creation. Happy building!

Share:

Cantilever pergola plans for creating open and airy spaces

Cantilever Pergola Plans for Creating Open and Airy Spaces

Cantilever pergolas represent a sophisticated approach to outdoor living, offering a unique blend of architectural elegance and functional shade. Unlike traditional pergolas supported by posts at each corner, cantilever pergolas utilize a system of cantilevered beams, creating a floating, open aesthetic that maximizes the feeling of spaciousness. This comprehensive guide delves into the design, construction, and considerations involved in building your own cantilever pergola, allowing you to transform your outdoor space into a haven of airy sophistication.

Design Considerations: Achieving Architectural Harmony

Before embarking on the construction process, meticulous planning is paramount. The design phase dictates the overall success and aesthetic appeal of your cantilever pergola. Several key considerations must be addressed to ensure the structure is both visually appealing and structurally sound.

Defining the Scope and Scale

The size and dimensions of your cantilever pergola will significantly impact its overall impact and functionality. Consider the available space, the intended use (dining, relaxation, etc.), and the surrounding landscape architecture. A larger pergola might be suitable for expansive gardens, while a smaller structure might be more appropriate for a patio or deck. Accurate measurements are essential to avoid costly mistakes during the construction phase.

Material Selection: Balancing Aesthetics and Durability

The choice of materials significantly influences the longevity and aesthetic appeal of your cantilever pergola. Popular options include:

  • Wood: Offers a classic, warm aesthetic and can be stained or painted to complement your existing landscape. Pressure-treated lumber is recommended for enhanced durability against rot and insect infestation.
  • Aluminum: A low-maintenance option that is lightweight, strong, and resistant to corrosion. Powder-coated finishes provide a wide range of color choices.
  • Steel: Provides exceptional strength and durability, making it ideal for large or complex designs. However, steel requires regular maintenance to prevent rust and corrosion.

The selected material will influence the overall design, structural calculations, and the required fastening systems. Careful consideration should be given to the inherent properties of each material to ensure structural integrity.

Integrating the Pergola into its Surroundings

The cantilever pergola should seamlessly integrate with its surrounding environment. Consider the existing architectural style of your home and other structures. Maintaining a cohesive design palette, employing similar materials or color schemes, will ensure the pergola enhances rather than detracts from the overall aesthetic. The surrounding landscaping should also be considered; plants and other features should complement the pergola’s design and not compete for visual attention.

Structural Engineering: Ensuring Stability and Longevity

The cantilever design, while aesthetically pleasing, presents unique structural challenges. The absence of intermediate supports requires careful calculation of beam spans, load-bearing capacity, and anchoring mechanisms. To avoid structural failure, professional engineering advice is highly recommended, especially for larger or more complex designs.

Calculating Load Bearing Capacity

Accurate calculation of the load-bearing capacity of the cantilever beams is crucial. This involves considering the weight of the pergola itself, the anticipated snow load (in relevant climates), and any additional loads, such as seating, plants, or other adornments. Using appropriate engineering software or consulting with a structural engineer will ensure the structure can safely withstand these loads.

Anchoring and Support Systems

The cantilever beams require robust anchoring systems to transfer the load to the ground or a supporting structure. The chosen anchoring method will depend on the material of the pergola, the soil conditions, and the overall design. Common anchoring techniques include deep foundation footings, concrete piers, or bolting to existing structures. The selection and implementation of these systems should be carefully planned and executed by qualified professionals to guarantee structural stability and prevent failure.

Selecting Appropriate Beam Sizes and Materials

The size and material of the cantilever beams are determined by the calculated load-bearing requirements and the overall span. Larger spans will require larger, stronger beams. Professional engineering calculations should guide the selection of appropriate materials and dimensions to ensure structural integrity and longevity. Properly sized beams will guarantee the stability and safety of the structure over time, resisting potential damage from environmental factors or excessive loading.

Construction Techniques: A Step-by-Step Guide

The construction process requires meticulous attention to detail and adherence to safe work practices. While specific techniques vary based on the chosen design and materials, the general steps remain consistent.

Foundation Preparation

A solid foundation is essential for a stable and long-lasting cantilever pergola. This involves excavating, pouring concrete footings or piers, and allowing sufficient curing time before proceeding with the installation of the supporting structure. The quality of the foundation directly impacts the overall stability and lifespan of the pergola.

Framing and Beam Installation

The framing system consists of the main cantilever beams, supporting posts (if any), and any additional bracing or cross-members. Precise measurements and proper alignment are critical to ensure structural integrity. The chosen fastening methods, whether bolts, screws, or welds, must be appropriate for the selected materials and load-bearing requirements. Accurate installation of the beams is vital for the structural performance of the pergola.

Roofing and Finishing Touches

The final stage involves installing the roofing material, which can range from latticework to solid panels, depending on the desired level of shade and privacy. Finishing touches, such as painting, staining, or sealing, protect the pergola from the elements and enhance its aesthetic appeal. The final finishing ensures both the longevity and aesthetic quality of the project, protecting it from weather damage and enhancing its visual appeal.

Conclusion: Enjoying Your Open and Airy Space

Building a cantilever pergola is a rewarding project that transforms outdoor spaces into elegant and functional extensions of the home. By carefully considering the design, engaging professional expertise where necessary, and meticulously following construction techniques, you can create a striking structure that offers shade, enhances privacy, and adds significant value to your property. The resulting open and airy space provides a perfect setting for relaxation, entertaining, or simply enjoying the beauty of the outdoors.

Share:

How to make a wooden wall shelf with stylish design

Craft a Chic Wooden Wall Shelf: A Step-by-Step Guide

Tired of cluttered surfaces and a lack of stylish storage? Building your own wooden wall shelf offers a rewarding DIY project that perfectly blends functionality with personalized design. This guide walks you through creating a stunning, unique shelf, tailored to your aesthetic. Prepare to transform a blank wall into a stylish focal point!

Choosing Your Wood and Design

The journey begins with selecting the perfect wood. Consider the overall style of your room. Reclaimed wood offers rustic charm and unique character, while smooth, finished hardwoods like maple or oak provide a more contemporary look. Think about the color and grainâ€"will it complement existing furniture or create a striking contrast? Once you've chosen your wood, sketch out your design. Do you envision a single, long shelf, or a series of smaller, tiered shelves? Will it be minimalist and sleek, or feature intricate curves and details? Consider the weight it will hold and choose dimensions accordingly. A simple straight shelf is a great beginner project, while more complex designs will challenge your woodworking skills.

Gathering Your Materials and Tools

Before you begin, gather all your materials and tools. This minimizes interruptions during construction. You'll need:

  • Your chosen wood (consider thickness for stability)
  • Wood screws (appropriate length for your shelf thickness and wall type)
  • Wall anchors (if necessary, depending on your wall type and shelf weight)
  • Wood glue
  • Sandpaper (various grits for smoothing)
  • Wood stain or paint (optional, for a finished look)
  • Measuring tape
  • Pencil
  • Saw (circular saw or hand saw)
  • Drill with drill bits (to pilot holes for screws)
  • Level
  • Safety glasses

Remember safety first! Always wear safety glasses when using power tools.

Constructing Your Shelf

Cutting the Wood

Accurately measure and cut your wood to your desired dimensions using your saw. For a straight shelf, this is a simple cut. More complex designs may require multiple cuts and careful attention to angles. Always measure twice and cut once to avoid mistakes.

Sanding and Finishing

Once cut, thoroughly sand all surfaces to achieve a smooth finish. Start with a coarser grit sandpaper and progressively move to finer grits for a polished look. This step significantly enhances the shelf's appearance and prevents splinters. If desired, apply wood stain or paint according to the manufacturer's instructions, allowing ample drying time between coats.

Attaching Brackets or Supports

For added support and a stylish design, consider using decorative brackets. These are available in various styles, from simple metal brackets to ornate wooden ones. Securely attach the brackets to the shelf and the wall using screws and wall anchors (if needed) ensuring proper leveling throughout the process.

Installing Your Stunning Shelf

Locate the studs in your wall using a stud finder to ensure secure attachment. Mark the locations of your brackets on the wall, using a level to maintain a straight line. Pre-drill pilot holes to prevent wood splitting, then carefully attach your brackets to the wall. Finally, carefully mount the shelf onto the brackets, making sure it's level and secure. Admire your handiworkâ€"you’ve successfully created a stylish and functional addition to your home!

Share:

How to build a picnic table with umbrella support

Building Your Dream Picnic Table with Built-in Umbrella Support

Hey there, fellow DIY enthusiasts! So, you're thinking about building a picnic table, but you want to go the extra mile and incorporate an umbrella support? Fantastic! It’s a seriously satisfying project, and you’ll end up with a beautiful, functional piece of outdoor furniture you can be proud of. Let’s dive into how to make this happen, step-by-step. Don't worry, even if you're a complete beginner, we'll walk through it together.

Planning and Materials: The Foundation of Success

Before we even think about picking up a saw, let's get organized. This is the crucial part where you avoid those frustrating “Oh, I forgot…” moments later on.

Choosing Your Wood

The type of wood you choose will significantly impact the durability and lifespan of your picnic table. Pressure-treated lumber is a popular choice because it resists rot and insect damage, making it ideal for outdoor use. However, it often has a slightly less appealing aesthetic. Cedar and redwood are beautiful alternatives, naturally resistant to decay, but they're more expensive. Whatever you choose, make sure the wood is properly dried to prevent warping and cracking.

Making a Detailed Cut List

This is where things get a little mathematical, but don't panic! I’m not talking rocket science here. You'll need to determine the overall dimensions of your picnic table â€" the length, width, and height are key. Then, you'll need to break down those dimensions into individual pieces: the legs, the seat supports, the tabletop boards, and the umbrella support components. A simple sketch is hugely helpful. I recommend creating a detailed cut list specifying the dimensions of each piece (length, width, and thickness). This will save you headaches and wood waste later on.

Gathering Your Tools

Having the right tools makes all the difference. You’ll need:

  • Measuring tape
  • Pencil
  • Circular saw or hand saw
  • Drill with various drill bits
  • Screwdriver (preferably a cordless one)
  • Level
  • Clamps
  • Wood glue
  • Exterior-grade wood screws (various lengths)
  • Safety glasses
  • Work gloves
  • Sandpaper (various grits)
  • Wood stain or sealant (optional)

Believe me, investing in quality tools will make the whole process smoother and safer.

Construction: Bringing Your Vision to Life

Now for the fun part! Let’s build this thing!

Building the Base

Start by constructing the base of the picnic table. This usually involves building two sturdy rectangular frames using four legs and connecting them with support beams. Use wood glue and screws to securely join the pieces, ensuring everything is perfectly square and level. Remember those clamps? They’ll be your best friends during this phase.

Adding the Seat Supports

Once the base is solid, attach the seat supports. These are typically 2x4s or 2x6s running horizontally across the base frame. Space these evenly to distribute weight properly. Again, glue and screws are your allies here.

Attaching the Tabletop

Lay down your tabletop boards on the base frame, ensuring they’re evenly spaced and flush with each other. Securely attach them using screws, taking care not to overtighten and split the wood. Pre-drilling pilot holes is crucial here to prevent splitting.

Integrating the Umbrella Support

This is where your picnic table elevates to the next level! There are a few approaches to incorporating the umbrella support:

  • Center Support: You can build a central support post directly into the table's framework. This requires careful planning and positioning to ensure stability and doesn't interfere with seating.
  • Offset Support: A more common and often aesthetically pleasing option is to attach the umbrella support to one of the table's end supports, slightly offset from the center. This keeps the umbrella out of the way of seating and provides a visually balanced design.

Regardless of your chosen method, ensure the support is strong and secure enough to hold a heavy umbrella, especially in windy conditions. Use strong screws and consider reinforcing the structure with additional bracing. A metal umbrella holder is also highly recommended for added stability.

Finishing Touches: Adding the Polish

You've built the table, congratulations! But let’s make it truly shine.

Sanding

Sand all surfaces thoroughly, starting with coarser grit sandpaper and progressively moving to finer grits. This will create a smooth finish and prevent splinters. Pay special attention to any areas where screws were driven in.

Finishing

Apply a wood stain or sealant to protect your picnic table from the elements. Choose an outdoor-grade finish that's resistant to UV rays, moisture, and insect damage. Allow ample drying time between coats.

Safety First!

Remember safety first throughout the entire building process. Always wear safety glasses and work gloves. Use caution with power tools and ensure your workspace is well-lit and free of clutter. Take your time, and don't rush the process. A well-built, safe picnic table is far more important than a quickly finished one.

Commonly Asked Questions

Here are some frequently asked questions about building picnic tables with umbrella support:

What kind of umbrella should I use?

Use an umbrella specifically designed for outdoor use and that is compatible with the size and type of support you've built.

How much does this project cost?

The cost varies depending on the type of wood you choose and the size of your picnic table. Budget around $100-$300 for materials.

Can I build this without prior woodworking experience?

Absolutely! While some basic woodworking skills are helpful, this project is manageable for beginners. Take your time, follow the instructions carefully, and don’t hesitate to ask for help if you get stuck.

How long does it take to build?

Allow yourself a weekend, or potentially two, depending on your skill level and how much time you can dedicate to the project each day.

What if the wood warps?

Using properly dried lumber significantly reduces the risk of warping. However, if warping does occur, you may need to sand down affected areas and potentially re-apply a sealant.

Happy building! I hope this guide helps you create the perfect picnic table for your backyard. Feel free to share your creations with me â€" I'd love to see them!

Share:

Compact woodworking furniture for apartments

Compact Woodworking Furniture for Apartments: Maximizing Space and Style

The contemporary apartment dweller faces a unique design challenge: creating a functional and aesthetically pleasing living space within often limited square footage. Traditional furniture, designed for larger homes, can easily overwhelm a smaller apartment, resulting in a cramped and cluttered environment. However, the strategic application of woodworking techniques allows for the creation of custom, compact furniture that not only maximizes space but also elevates the overall aesthetic appeal of the apartment. This article explores the possibilities of compact woodworking furniture tailored for apartment living, emphasizing design considerations, material selection, and construction techniques.

Design Considerations for Compact Woodworking Furniture

Designing compact furniture requires a shift in perspective from maximizing visual impact to optimizing functionality within a constrained space. The focus should be on multi-functional pieces that serve multiple purposes and minimize visual bulk. Careful consideration of dimensions, materials, and storage solutions is paramount.

Maximizing Vertical Space

Vertical space is often underutilized in apartment design. Employing tall, narrow cabinets, shelving units that reach the ceiling, and lofted beds are all effective strategies to increase storage capacity without sacrificing valuable floor space. Consider using ladder-style shelving systems or integrated ladders for access to higher shelves, adding a unique design element while maintaining practicality.

Multi-Functional Designs

Multi-functional furniture is the cornerstone of compact apartment living. A coffee table with built-in storage, a sofa bed that doubles as a guest bed, or a dining table that folds away against the wall are all examples of space-saving innovations. Woodworking allows for the precise customization of such pieces to perfectly fit the dimensions and style of the apartment.

Built-in Storage Solutions

Built-in storage is another crucial element in compact apartment design. Custom-built shelving units, alcove cabinets, and even under-stair storage solutions can dramatically increase storage capacity while seamlessly integrating into the overall design scheme. Careful planning is crucial to ensure that storage solutions are both accessible and visually appealing.

Minimizing Visual Bulk

The visual impact of furniture is just as important as its functionality. Choosing lighter-colored woods, such as maple or birch, can create a sense of openness and spaciousness. Clean lines, simple designs, and the absence of excessive ornamentation contribute to a more streamlined and less cluttered appearance. Consider using recessed handles or minimalist hardware to further reduce visual bulk.

Material Selection for Compact Woodworking Furniture

The choice of materials significantly impacts the durability, aesthetics, and overall weight of the furniture. Selecting lightweight yet robust materials is critical for maximizing space and minimizing the visual impact of the furniture.

Lightweight Wood Species

Lightweight wood species, such as pine, poplar, or bamboo, are ideal for compact furniture. These woods offer a good strength-to-weight ratio, allowing for the creation of sturdy pieces without excessive weight. Furthermore, these woods are often more affordable than heavier hardwoods, making them an economical choice for apartment dwellers.

Plywood and MDF

Plywood and medium-density fiberboard (MDF) are versatile and cost-effective materials that are well-suited for creating compact furniture. Plywood's layered construction offers excellent strength and stability, while MDF provides a smooth, even surface ideal for painting or staining. Combining these materials with hardwood veneers can enhance the aesthetic appeal while maintaining a relatively light weight.

Sustainable and Eco-Friendly Options

Increasingly, apartment dwellers are prioritizing sustainability and eco-friendliness. Choosing sustainably harvested wood, reclaimed lumber, or rapidly renewable materials like bamboo demonstrates environmental consciousness. These materials not only reduce the environmental impact of furniture production but also contribute to a more ethical and responsible consumption pattern.

Construction Techniques for Compact Woodworking Furniture

The construction techniques employed significantly affect the durability, stability, and longevity of the furniture. Choosing appropriate joinery techniques and finishes is crucial for ensuring the furniture's resilience to everyday use within a smaller living space.

Joinery Techniques

Strong and reliable joinery is crucial for ensuring the structural integrity of the furniture. While traditional joinery techniques like mortise and tenon joints are excellent for strength, they can be more time-consuming. For compact furniture, simpler yet strong techniques like dowel joints, pocket hole screws, or biscuits can be equally effective and more efficient. The choice of joinery should be based on the specific design and the level of woodworking expertise.

Hardware and Fasteners

The selection of hardware and fasteners significantly influences the functionality and durability of the furniture. High-quality hinges, slides, and drawer runners ensure smooth operation and longevity. Concealed hardware can further enhance the aesthetic appeal by minimizing visual clutter. Choosing strong and reliable screws, bolts, and other fasteners is essential for maintaining the structural integrity of the furniture.

Finishes and Protection

Applying appropriate finishes protects the wood from moisture damage, scratches, and wear and tear. A durable finish enhances the longevity of the furniture and contributes to its overall aesthetic appeal. Options include oil-based finishes, water-based polyurethane, and natural waxes. The choice of finish should be based on the type of wood and the desired level of protection and sheen.

Examples of Compact Woodworking Furniture for Apartments

The versatility of woodworking allows for countless possibilities in creating compact and stylish apartment furniture. Here are a few examples:

  • Murphy Bed: A wall-mounted bed that folds away during the day, freeing up valuable floor space.
  • Fold-Down Desk: A desk that folds away against the wall when not in use, creating a flexible workspace.
  • Modular Shelving Units: Customizable shelving units that can be adapted to fit specific spaces and storage needs.
  • Storage Ottoman: An ottoman with built-in storage space for blankets, pillows, or other items.
  • Nesting Tables: A set of tables that can be nested together to save space when not in use.
  • Corner Desk: A desk designed to fit into a corner, maximizing the use of otherwise unused space.
  • Loft Bed with Desk Underneath: A loft bed with a built-in desk or workspace underneath, creating a multifunctional sleeping and working area.

By carefully considering design, material selection, and construction techniques, apartment dwellers can create custom woodworking furniture that is both functional and aesthetically pleasing, transforming a small living space into a comfortable and stylish home.

Share:

Affordable small woodworking project supplies

Affordable Small Woodworking Project Supplies: A Comprehensive Guide

Embarking on a woodworking project can be a rewarding experience, fostering creativity and providing a tangible sense of accomplishment. However, the initial hurdle for many aspiring woodworkers is the perceived cost of materials. This comprehensive guide aims to dispel this misconception, demonstrating that engaging in small woodworking projects can be both affordable and highly fulfilling, even with a limited budget. By focusing on strategic sourcing, efficient material usage, and selecting appropriate projects, aspiring woodworkers can overcome financial barriers and begin crafting immediately.

Sourcing Affordable Lumber and Wood Products

The cornerstone of any woodworking project is the lumber. Securing affordable lumber requires a multi-pronged approach, combining resourcefulness with careful planning.

Repurposing and Salvaged Materials

One of the most economical approaches involves repurposing existing materials. Instead of purchasing new lumber, consider utilizing reclaimed wood. This could include dismantling old pallets (ensuring they are treated appropriately for indoor use), recovering wood from demolition sites (with proper permission), or sourcing reclaimed lumber from architectural salvage yards. While these materials may require additional cleaning and preparation, the significant cost savings can be substantial. Careful inspection is crucial to identify any potential issues, such as rot or pest infestation, before integration into the project.

Discount Lumber Yards and Home Improvement Stores

Discount lumber yards and home improvement stores frequently offer sales and discounted materials. Checking for weekly flyers and utilizing online resources to compare prices can lead to significant savings. Smaller pieces of lumber, often considered scraps, are frequently sold at reduced prices and are ideal for smaller projects. Don't hesitate to ask store employees about discounted or damaged lumber â€" often these imperfections are easily manageable and won't impact the final product.

Online Marketplaces and Classifieds

Online marketplaces and classified advertisements can be treasure troves of affordable woodworking supplies. Individuals and businesses often sell surplus lumber or wood scraps at drastically reduced prices. Thorough communication and careful inspection of the materials are crucial to ensure quality and avoid disappointment. Be prepared to pick up materials yourself, as shipping costs can quickly negate the price advantage.

Optimizing Material Usage and Minimizing Waste

Careful planning and efficient cutting techniques can significantly reduce material waste and ultimately lower project costs. This involves meticulous measurement, precise cutting, and thoughtful design considerations.

Detailed Planning and Accurate Measurements

Before purchasing any lumber, create detailed plans and diagrams of your project. This allows for precise measurement of the required lumber lengths and avoids unnecessary purchases. Utilizing CAD software or even simple sketching can significantly improve accuracy and reduce waste. Consider creating a cutting list to organize your needs and minimize errors.

Efficient Cutting Techniques and Joint Design

Employing efficient cutting techniques is crucial. Mastering basic joinery techniques, such as butt joints, miter joints, and dado joints, allows for greater precision and minimizes material wastage. Consider using a miter saw or circular saw for accurate cuts, especially when working with longer pieces of lumber. Practice cutting techniques on scrap wood to refine your skills before working with your final pieces.

Creative Scrap Wood Utilization

Rather than discarding scrap wood, consider its potential use in future projects. Even small pieces can be repurposed for smaller crafts, inlays, or as test pieces for finishing techniques. Properly storing these scraps, organized by wood type and dimension, can provide a readily available resource for future endeavors.

Choosing Affordable Project Ideas

Selecting the right project is critical for maximizing affordability. Begin with smaller, simpler projects that require less material and fewer specialized tools.

Simple Projects for Beginners

Beginners should focus on projects that require minimal tools and materials. Examples include:

  • Simple picture frames
  • Small cutting boards
  • Coasters
  • Small shelves
  • Wooden boxes
These projects allow you to practice fundamental woodworking skills without incurring significant material costs. As your skills improve, you can gradually progress to more complex designs.

Utilizing readily available hardware

Opt for readily available and inexpensive hardware such as screws, nails, and wood glue. Avoid overly expensive or specialized hardware unless absolutely necessary for the project's structural integrity. Simple designs often require fewer fasteners, further reducing costs.

Prioritizing Functionality over Elaborate Design

Focus on the functionality of the project rather than overly elaborate designs. While intricate designs may be aesthetically pleasing, they often require more materials and more advanced techniques. Simple, well-executed projects can be equally satisfying and less costly.

Tool Acquisition and Management

The initial investment in tools can seem daunting, but strategic acquisition can minimize upfront costs.

Prioritizing Essential Tools

Begin with a core set of essential tools rather than purchasing a complete workshop immediately. These essentials include a measuring tape, a hand saw or circular saw, a hammer, a screwdriver, clamps, and sandpaper. As your skills and project complexity increase, you can gradually expand your tool collection.

Borrowing and Sharing Tools

Consider borrowing tools from friends, family, or community workshops. Many community centers offer tool-sharing programs or workshops, providing access to equipment without the need for individual purchases. This collaborative approach can significantly reduce upfront costs.

Used Tool Acquisition

Purchasing used tools from reputable sources, such as online marketplaces or garage sales, can significantly reduce costs. Carefully inspect used tools for functionality and damage before purchasing. A well-maintained used tool can often perform as well as a new one at a fraction of the price.

By implementing these strategies, aspiring woodworkers can significantly reduce the financial barriers to entry, transforming woodworking from a costly hobby into an affordable and enriching pastime. Remember, the focus should be on the enjoyment of the creative process and the satisfaction of crafting functional and beautiful items, not on the cost of materials. With careful planning and resourcefulness, anyone can engage in rewarding small woodworking projects regardless of budget constraints.

Share:

Beginner-friendly woodworking furniture projects

So You Want to Build Some Furniture? Awesome! Here's Where to Start

Hey there, future woodworker! So you've caught the woodworking bug? Fantastic! Building your own furniture is incredibly rewarding, and honestly, way more achievable than you might think. This guide is all about getting you started on the right foot, focusing on beginner-friendly projects that will give you a sense of accomplishment and build your skills without driving you crazy (or to the emergency room!).

Choosing Your First Project: Simple is Best

The key to success with any beginner project is to start small and simple. Don't jump into building a complex Victorian-era dresser on your first try! Trust me, you'll thank me later. Here are a few ideas perfect for newbies:

The Humble Bookshelf

A simple bookshelf is a classic beginner project. You can choose a design with just a few shelves supported by vertical sides. No crazy joinery needed â€" just some basic cuts, some screws, and maybe some wood glue. You can customize it to fit your space and style by choosing different woods or adding a little paint.

A Nifty Nightstand

Similar to the bookshelf, a nightstand doesn't require complex construction. A simple box with a drawer or two is perfectly manageable. This is a great opportunity to learn about drawer construction, which is a useful skill to have.

A Rustic Coffee Table

Think simple here! A low platform with thick, chunky legs is easier than it looks. You can even use reclaimed wood for a rustic, unique look. This project is great for learning about using thicker wood and making sure your cuts are accurate.

A Small, Simple Plant Stand

This is a fantastic choice for getting used to working with smaller pieces of wood and focusing on precise cuts. It's also a great project to practice finishing techniques on. Plus, you get a beautiful plant stand at the end!

Essential Tools: Don't Break the Bank!

You don't need a fully equipped workshop to get started. Start with these essentials, and you can add more as you progress:

  • Measuring Tape: Accurate measurements are crucial!
  • Pencil: For marking your cuts.
  • Saw: A hand saw or a circular saw will do the trick. A circular saw is faster, but a hand saw is great for practicing precision.
  • Drill: Essential for pilot holes and screwing things together.
  • Screwdriver bits: Match your drill to the screws you use.
  • Wood Glue: A vital component for strong joints.
  • Safety Glasses: Protect your eyes!
  • Clamps: To hold pieces together while the glue dries.
  • Sandpaper: Various grits for smoothing your project.
  • Wood Finish (optional): To protect and enhance your creation (paint, stain, varnish, etc.).

You can find many of these tools at reasonable prices at your local hardware store. Don't feel pressured to buy the most expensive tools right away â€" invest in quality gradually as you develop your skills.

Getting Started: Step-by-Step Approach

No matter which project you choose, follow these steps:

  1. Plan Your Project: Find a simple plan online (Pinterest and YouTube are great resources!). Don't be afraid to modify a plan to suit your taste and available materials.
  2. Gather Your Materials: Buy the wood, screws, glue, and any other necessary supplies.
  3. Cut Your Wood: This is where accuracy is key. Take your time, double-check your measurements, and make clean cuts.
  4. Assemble Your Project: Follow your plan carefully. Use glue and screws to create strong, secure joints.
  5. Sand Your Project: Start with a coarser grit sandpaper and gradually move to finer grits for a smooth finish.
  6. Finish Your Project: Apply your chosen finish â€" paint, stain, varnish â€" according to the manufacturer's instructions.

Learning Resources: The Internet is Your Friend!

Don't be shy about using the internet to your advantage! There's a treasure trove of information and tutorials out there. Here are some great places to start:

  • YouTube: Search for "beginner woodworking projects" or the specific project you've chosen. Tons of videos demonstrate techniques and show you the process step-by-step.
  • Pinterest: Find inspiration and plans for various projects. You can save ideas to a board and refer to them as you work.
  • Woodworking Blogs and Websites: Many websites offer detailed instructions, tips, and advice for woodworkers of all skill levels.

Embrace the Learning Process!

Woodworking is a skill that takes time and practice to develop. Don't get discouraged if your first project isn't perfect. Every mistake is a learning opportunity. The most important thing is to have fun, enjoy the process, and be proud of what you create. Over time, your skills will improve, and you'll be building more complex and impressive pieces.

Frequently Asked Questions

Q: What type of wood is best for beginners?

A: Pine and Fir are great choices for beginners. They're relatively inexpensive, easy to work with, and readily available.

Q: How do I prevent wood from splitting when screwing?

A: Always drill pilot holes slightly smaller than the screw diameter before screwing. This prevents the wood from splitting.

Q: What kind of safety precautions should I take?

A: Always wear safety glasses. Use appropriate hearing protection when using power tools. Make sure your workspace is well-lit and clutter-free. Never rush â€" take your time and work carefully.

Q: What if I make a mistake?

A: Don't worry! Everyone makes mistakes. Sometimes you can fix them, sometimes you might have to start over. Learn from your mistakes, and keep practicing!

Q: Where can I find woodworking plans?

A: You can find tons of free woodworking plans online, on websites like Pinterest, Instructables, and various woodworking blogs. Just search for “beginner woodworking plans” or the specific project you want to build.

Happy woodworking!

Share:

Postingan Populer

Search This Blog

Powered by Blogger.

Arsip Blog

Recent Posts

Pages