Build Simple and Easy Woodworking Projects with These Plans

Simple and Easy Woodworking Projects with Detailed Plans

Woodworking offers a rewarding and accessible hobby for individuals of all skill levels. The satisfaction derived from crafting functional and aesthetically pleasing items from raw materials is unparalleled. This article provides detailed plans for several simple woodworking projects, perfect for beginners and those seeking straightforward yet satisfying endeavors. These projects require minimal tools and materials, ensuring an accessible entry point into the world of woodworking.

Project 1: A Simple Wooden Coasters Set

This project introduces fundamental woodworking techniques such as measuring, cutting, and sanding. The resulting coasters are both practical and decorative, ideal for protecting furniture surfaces.

Materials Required:

  • Four pieces of 4" x 4" hardwood (e.g., maple, oak, or cherry) – approximately ½ inch thick
  • Sandpaper (various grits, from 100 to 220)
  • Wood glue
  • Wood finish (e.g., polyurethane, varnish, or beeswax)
  • Measuring tape
  • Pencil
  • Hand saw or jigsaw
  • Clamps
  • Cloth rags

Instructions:

  1. Cut the wood: Using a hand saw or jigsaw, carefully cut each piece of wood into a 4-inch square. Ensure clean, square cuts for a professional finish. Accuracy in this step is crucial for a cohesive final product.
  2. Sand the edges: Sand all four edges of each square, starting with coarser grit sandpaper (100 grit) and progressively moving to finer grits (150, then 220) for a smooth finish. This removes any rough edges and prepares the wood for finishing.
  3. Apply the finish: Once sanded, apply a thin, even coat of your chosen wood finish. Allow ample drying time as specified by the manufacturer's instructions. Multiple thin coats are preferable to one thick coat to avoid drips and ensure even coverage. Allow for thorough drying between coats.
  4. Optional: Add felt pads: For added protection to your furniture, glue small felt pads to the bottom of each coaster. This prevents scratching and provides better grip.

Safety Note: Always wear safety glasses when using power tools and exercise caution when handling sharp tools.

Project 2: A Rustic Key Holder

This project utilizes reclaimed wood for a unique and environmentally conscious approach. It's a functional piece that adds character to any entryway.

Materials Required:

  • A piece of reclaimed wood (approximately 6" x 12" x 1") – the character of the wood adds to the rustic aesthetic
  • Four cup hooks
  • Screws suitable for the wood type
  • Sandpaper (various grits)
  • Wood stain or paint (optional)
  • Screwdriver
  • Drill (if using screws that require pre-drilling)

Instructions:

  1. Prepare the wood: Sand the reclaimed wood to remove any splinters or rough edges. Clean the wood thoroughly to remove any dust or debris.
  2. Optional: Stain or paint: If desired, apply a wood stain or paint to enhance the appearance of the wood. Allow ample drying time.
  3. Attach the hooks: Mark the positions for the cup hooks, ensuring they are evenly spaced. Pre-drill pilot holes if necessary, then securely attach the hooks using the appropriate screws.

Note: The beauty of this project lies in the unique character of the reclaimed wood. Embrace any imperfections and knots for a truly rustic look.

Project 3: A Simple Wooden Shelf

This project provides an opportunity to explore joinery techniques and build a practical storage solution. It's a great introduction to more complex woodworking skills.

Materials Required:

  • Two pieces of 1" x 12" hardwood – approximately 12" long (for supports)
  • One piece of 1" x 12" hardwood – approximately 24" long (for the shelf)
  • Wood glue
  • Wood screws
  • Sandpaper
  • Wood finish (optional)
  • Drill
  • Screwdriver
  • Measuring tape
  • Pencil
  • Clamps

Instructions:

  1. Prepare the wood: Sand all pieces of wood to achieve a smooth surface.
  2. Assemble the shelf: Position the shorter support pieces vertically at each end of the longer shelf piece. Apply wood glue to the joining surfaces and secure with screws. Ensure the support pieces are level and properly aligned.
  3. Optional: Finish the shelf: After the glue has dried, apply a wood finish for protection and aesthetic enhancement.

Tip: For added strength and stability, consider using pocket hole joinery. This technique involves drilling angled holes and inserting screws for a strong, concealed joint. This requires a specialized jig, readily available at most hardware stores.

These three projects offer a starting point for a fulfilling woodworking journey. As your skills develop, you can explore more complex projects, incorporating advanced techniques and designs. Remember always to prioritize safety and take your time to ensure accuracy and precision in your work. The satisfaction of creating something beautiful and useful with your own hands is a rewarding experience.

Share:

Fun Children Woodworking Projects for Creative Minds

Fun Children Woodworking Projects for Creative Minds

Hey there, parents and crafty kids! Are you looking for fun and engaging activities that combine creativity with the satisfaction of building something with your own two hands? Look no further! Woodworking might seem intimidating, but with the right approach and safety precautions, it can be a fantastically rewarding experience for kids of all ages (with appropriate supervision, of course!). Let's explore some amazing woodworking projects perfect for sparking your child's imagination and developing valuable skills.

Simple Projects for Little Hands (with Adult Supervision!)

For younger children, we need to focus on projects that are safe, manageable, and incredibly satisfying. Think small scale and simple tools. Remember, safety always comes first!

Miniature Birdhouses

These are adorable! You can use pre-cut wood pieces or even craft sticks glued together to form the basic structure. Kids can then decorate their birdhouses with paint, glitter, or even natural materials like small twigs and leaves. It's a great way to introduce them to basic gluing techniques and unleash their artistic flair. Plus, you can hang them in your garden afterward – a truly rewarding experience!

Wooden Puzzles

Creating simple jigsaw puzzles from scrap wood is a fantastic project. Start with a larger piece of wood and let your child help you draw and cut out simple shapes like squares, circles, and triangles. Once cut (again, with adult supervision!), they can decorate each piece and then reassemble their own creation. It's a wonderful learning experience about shapes, colors, and problem-solving!

Decorative Coasters

These are super easy and require minimal tools. Find some thin, square pieces of wood (or use thicker ones and carefully sand them down). Kids can paint them, decorate them with decoupage, or even burn simple designs onto them with a wood-burning tool (under strict adult supervision!). These make wonderful gifts, and kids will love using their own creations.

Intermediate Projects for Growing Skills

As kids develop their skills and confidence, you can move on to projects that involve more complex techniques and tools. Always prioritize safety and ensure they understand the proper use of each tool before starting.

Simple Toy Cars

With some pre-cut wooden blocks and wheels (available at most craft stores), you can build simple toy cars. This project introduces kids to basic carpentry concepts like joining pieces together using wood glue and possibly small nails (with adult supervision and the right tools!). They can paint and decorate their cars to their heart's content.

Keychains

Making keychains is a great way to teach kids about sanding, drilling (with a child-safe drill and adult supervision!), and finishing. Start with small, sturdy pieces of wood, and let them sand them smooth. Then, with help, drill a small hole for the keyring. They can personalize them with paint, stamps, or even pyrography (wood burning – again, with strict adult supervision!).

Picture Frames

Creating a simple picture frame is a fantastic way to build woodworking skills. You'll need to cut the wood to size, use miter joints (with adult assistance), and glue the pieces together. Once dry, they can decorate the frame and display their favorite artwork inside. This project teaches about angles, measurements, and precision.

Advanced Projects for Aspiring Woodworkers

Once your child has mastered the basics, you can challenge them with more ambitious projects that require advanced techniques and tools.

Small Wooden Boxes

Building a small wooden box involves multiple steps, including precise cutting, joining techniques (like rabbet joints), and finishing. This project introduces them to the world of woodworking joinery, a crucial aspect of more complex projects. It also requires careful planning and measurement.

Simple Shelves

Building shelves might seem daunting, but with proper guidance, it's a rewarding project. This involves cutting wood to specific lengths, using appropriate fasteners (screws or nails), and ensuring the shelves are level and secure. It's a great way to apply their skills to a practical and useful project.

Wooden Toys

Once your child has some experience, you can tackle more complex toys like a simple rocking horse, a pull-along wagon, or a wooden train. These projects will challenge their skills, creativity, and problem-solving abilities while yielding a truly impressive result.

Tips for Successful Woodworking with Kids

  • Start small: Choose projects that are age-appropriate and manageable.
  • Prioritize safety: Always supervise children closely, and teach them the safe use of tools.
  • Use appropriate tools: Select tools that are designed for children or that you can easily adapt for safe use.
  • Embrace the mess: Woodworking can be messy, so be prepared for sawdust and paint splatters.
  • Focus on fun: The goal is to have fun and create something together. Don't be afraid to let your child's creativity shine.
  • Celebrate successes: Acknowledge and praise your child's efforts, regardless of the final outcome.
  • Commonly Asked Questions

    Q: What kind of wood is best for kids' woodworking projects?

    A: Softwoods like pine or balsa wood are ideal for beginners, as they're easier to cut and work with. Avoid hardwoods until they have more experience.

    Q: What tools do I need?

    A: You'll likely need a saw (a coping saw or hand saw is good for starting), sandpaper, wood glue, measuring tape, a pencil, and clamps. For more advanced projects, you might need drills, chisels, and other tools – always prioritize safety and child-appropriate versions where possible.

    Q: How can I ensure safety?

    A: Always supervise children closely, teach them the proper use of tools, and wear safety glasses. Use child-safe tools whenever possible. Consider using a workbench designed for kids to provide a stable and safe working environment.

    Q: What if my child makes a mistake?

    A: Mistakes are part of the learning process! Try to view them as learning opportunities. Sometimes mistakes can even lead to unique and creative solutions.

    Q: Where can I find pre-cut wood pieces?

    A: Craft stores, hardware stores, and online retailers often sell pre-cut wood pieces ideal for kids' projects. You can also use scraps of wood from other projects.

    Happy woodworking!

    Share:

    Best Beginner Woodworking Projects for DIY Lovers

    Best Beginner Woodworking Projects for DIY Lovers

    Stepping into the world of woodworking can feel daunting, but with the right project, you'll quickly discover the satisfaction of creating something beautiful and functional with your own hands. Forget complex joinery and intricate designs for now; these beginner-friendly projects will build your confidence and teach you fundamental skills. We've curated a selection of projects perfectly suited for novices, ensuring a positive and rewarding introduction to this rewarding craft.

    Simple & Satisfying Projects: Perfect for First-Timers

    Starting with simple projects helps you build a solid foundation. These won't just teach you basic techniques but also instill the patience and precision needed for more advanced woodworking. Don't underestimate the joy of completing your first project—that sense of accomplishment is a powerful motivator!

    1. A Simple Wooden Coasters Set

    Why it's perfect for beginners: Coasters require minimal tools and materials. You'll primarily use a saw (hand saw or jigsaw) to cut square pieces of wood, and sandpaper to smooth the edges. This project introduces you to the basics of measuring, cutting, and finishing. You can choose from various wood types, adding a personal touch to your creation. Consider adding a decorative element with a simple burn design or paint to enhance your coasters' visual appeal.

    2. A Rustic Wooden Shelf

    Why it's perfect for beginners: Building a simple shelf teaches you about measuring, cutting, and securing pieces together with screws or wood glue. You can choose a straightforward design and utilize readily available lumber from your local hardware store. This project also helps you understand the importance of accurate measurements for a structurally sound and aesthetically pleasing outcome. Finish your shelf with a stain or varnish for protection and a polished look.

    Level Up Your Skills: Slightly More Challenging Projects

    Once you've mastered the basics, you can move onto projects that introduce slightly more complex techniques. These projects will challenge you while still remaining achievable for a beginner.

    3. A Basic Wooden Cutting Board

    Why it's perfect for beginners: This project introduces you to the concept of joining wood pieces, though simple glue is usually sufficient for beginners. You'll learn about wood grain orientation for strength, and the importance of using food-safe finishes. Choose a hardwood like maple or cherry for durability and a beautiful finish. Remember to thoroughly sand the cutting board to create a smooth, safe surface.

    4. A Small Wooden Box

    Why it's perfect for beginners: This project helps you practice more precise cuts and learn basic joinery techniques, such as miter joints. You'll need a good understanding of your measurements and the importance of square cuts. While you can use simple glue, adding small nails or brads can further strengthen your box. Consider using a contrasting wood for the interior to add a touch of elegance.

    Essential Tools for Your Woodworking Journey

    Before you start, gather a few essential tools. You don't need a fully equipped workshop to begin. Start with these:

    • Measuring Tape
    • Pencil
    • Hand Saw or Jigsaw
    • Sandpaper (various grits)
    • Wood Glue
    • Clamps (at least two)
    • Safety Glasses

    Remember safety is paramount! Always wear safety glasses and take your time. Woodworking is a rewarding hobby; enjoy the process of learning and creating.

    Share:

    Aquarium Furniture Plans for Creative and Functional Tank Designs

    Aquarium Furniture Plans for Creative and Functional Tank Designs

    Beyond the Stand: Reimagining Aquarium Furniture

    Forget the standard, bulky aquarium stand. Today's aquascaping enthusiasts demand more than just a functional base for their underwater worlds. They crave integrated designs that seamlessly blend the aquarium into their living spaces, enhancing both the aesthetic appeal and the practicality of their hobby. This article explores creative and functional aquarium furniture plans, transforming the traditional aquarium setup into a stunning focal point.

    Imagine a custom-built cabinet that not only houses your aquarium but also incorporates cleverly designed storage for equipment, food, and cleaning supplies. Picture a sleek, modern console with the tank integrated into its design, providing a clean, minimalist look. Or perhaps a rustic, handcrafted stand that perfectly complements your farmhouse aesthetic. The possibilities are limitless when you begin to consider the aquarium not as a standalone object, but as an element within a larger, carefully planned piece of furniture.

    Designing Your Dream Aquarium Furniture: Key Considerations

    Before diving into the design phase, consider these crucial aspects: tank size and weight, material selection, and style integration with your existing decor. The weight of a full aquarium is substantial, requiring robust construction and secure placement. Consider materials like sturdy hardwood, reinforced plywood, or even metal for optimal support. The choice of material will also influence the overall aesthetic – a rustic oak stand complements a natural-themed aquarium, whereas a sleek, lacquered cabinet might be ideal for a modern, minimalist setup. Harmonizing your aquarium furniture with your existing interior design is essential for a cohesive and visually appealing space.

    Choosing the Right Materials

    The material you select significantly impacts both the durability and the aesthetic of your aquarium furniture. Hardwoods like oak or mahogany offer superior strength and a classic look. Plywood, when properly sealed and reinforced, provides a more affordable yet sturdy option. Metal frames, particularly powder-coated steel, offer a modern and industrial aesthetic while providing exceptional strength. Always ensure your chosen material is waterproof and resistant to moisture damage to prevent warping or deterioration.

    Incorporating Practical Features

    Functionality is key. Think beyond the basic stand and consider incorporating these features into your design:

    • Integrated lighting: Build in recessed lighting to highlight your aquarium and create a dramatic focal point.
    • Hidden compartments: Conceal equipment like filters and heaters within custom-built compartments for a cleaner look.
    • Adjustable shelving: Allow for flexible storage of supplies and decorations.
    • Cable management: Integrate channels or sleeves to neatly conceal power cords and tubing.

    Creative Aquarium Furniture Ideas

    Let your creativity flow! Here are some inspiring ideas to ignite your design process:

    The Built-in Aquarium Wall Unit

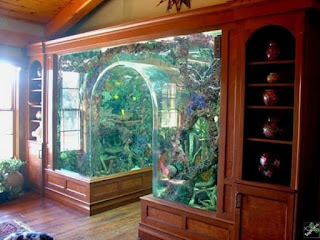
    Imagine a custom-built wall unit that seamlessly incorporates your aquarium into its design. This could feature open shelving for displaying aquatic-themed accessories or closed cabinets for storing equipment. The possibilities are endless, allowing you to create a truly unique and personalized display.

    The Coffee Table Aquarium

    For a truly bold statement, consider incorporating your aquarium into a custom-designed coffee table. This requires careful planning to ensure stability and safety, but the resulting piece is undeniably eye-catching and conversation-starting. Remember to use a durable, tempered glass top to protect the aquarium and withstand the weight.

    The Floating Aquarium Shelf

    Create a sense of lightness and airiness with a floating aquarium shelf. This innovative design gives the illusion that the aquarium is suspended in mid-air, adding a touch of modern elegance to your space. This requires robust support mechanisms hidden from view, emphasizing the sleek, minimalist aesthetic.

    By carefully considering the design elements and practical aspects, you can create stunning and functional aquarium furniture that elevates your aquascaping hobby to a whole new level. Embrace your creativity and transform your aquarium from a simple tank into a breathtaking centerpiece of your home.

    Share:

    Download Woodworking Plans for Every Skill Level

    Download Woodworking Plans for Every Skill Level

    The satisfying scent of freshly cut wood, the smooth feel of handcrafted pieces, the pride of creation – these are just some of the rewards that woodworking offers. Whether you're a seasoned artisan or a curious beginner, the world of woodworking awaits, brimming with projects to challenge and delight. And the best part? With readily available woodworking plans, you can jump right in, regardless of your experience level.

    Beginner Woodworking Projects: Simple & Rewarding

    Starting your woodworking journey doesn't require complex tools or years of experience. Numerous plans cater to absolute beginners, focusing on fundamental techniques and simple designs. These projects build confidence and teach essential skills without overwhelming you with intricate details. Think of the satisfaction of completing your first project – a small, functional item you built entirely with your own hands.

    Simple Shelves: Your First Step into Woodworking

    Building simple shelves is an excellent starting point. These projects often involve straightforward cuts, basic joinery (like butt joints), and straightforward assembly. Many free plans are available online, guiding you through each step with clear diagrams and instructions. Choose a small project, perhaps shelves for a spice rack or a small bathroom caddy. You'll quickly master measuring, cutting, and assembling—the foundation of any successful woodworking project. Remember to choose softwood like pine for ease of cutting.

    A Birdhouse: A Charming Introduction to Craftsmanship

    Constructing a birdhouse provides a delightful blend of function and aesthetics. You'll learn about accurate measurements, precise cuts, and the importance of properly assembling components to create a sturdy, weather-resistant structure. It's a charming project that offers a sense of accomplishment and maybe even attracts feathered friends to your backyard. Many free plans online provide detailed instructions and diagrams, perfect for beginners.

    Intermediate Woodworking Projects: Honing Your Skills

    Once you've mastered the basics, you can move on to intermediate projects that introduce more complex techniques and joinery methods. These projects demand more precision and attention to detail but provide a significant boost to your skills and confidence.

    A Coffee Table: Combining Form and Function

    Constructing a coffee table presents a more challenging yet rewarding endeavor. You'll practice more advanced joinery techniques such as dadoes, rabbets, or mortise and tenon joints. This project requires careful planning and accurate execution. However, the end result—a beautiful, functional piece of furniture you created yourself—makes all the effort worthwhile. Choose a straightforward design initially, focusing on solid construction rather than intricate embellishments.

    A Simple Wooden Chair: Mastering Advanced Techniques

    Building a simple wooden chair pushes your woodworking abilities to the next level. You'll delve into curved cuts (potentially requiring a coping saw or jig saw), advanced joinery, and likely work with more challenging wood species. This project requires patience, precision, and a good understanding of wood grain and movement. However, the satisfaction of creating a functional and comfortable chair is unparalleled.

    Advanced Woodworking Projects: Unleashing Your Creativity

    For experienced woodworkers, the possibilities are virtually limitless. Advanced projects demand a mastery of various techniques, an understanding of different wood types, and a keen eye for design. These projects allow you to express your individual style and create truly unique pieces.

    A Custom Built-in Bookshelf: A Statement Piece

    Designing and building a custom built-in bookshelf demonstrates a high level of woodworking proficiency. It requires meticulous planning, precise measurements, and expert joinery to create a seamlessly integrated and aesthetically pleasing addition to your home. The ability to tailor the design to your specific needs and space highlights true craftsmanship.

    A Detailed Armoire: The Pinnacle of Woodworking

    Creating an intricate armoire showcases the pinnacle of woodworking skill. This project involves complex joinery, intricate detailing, perhaps even carving or inlay work. It demands a thorough understanding of wood properties, finish techniques, and design principles. The final product is a stunning piece of furniture that represents a significant achievement and a testament to your dedication and skill.

    Remember: Regardless of your skill level, always prioritize safety. Wear appropriate safety gear, use sharp tools correctly, and take your time. The journey of learning and creating is as rewarding as the finished product itself. So, find a plan that excites you, gather your tools, and embark on your woodworking adventure!

    Share:

    Custom desk woodworking plans for crafting a unique workstation

    Building Your Dream Desk: A Custom Woodworking Project

    So, you're thinking about building a custom desk? Awesome! There's nothing quite like the satisfaction of crafting something beautiful and functional with your own two hands. And a desk? That's a piece of furniture you'll use every single day. This isn't just a project; it's an investment in your comfort and workspace. Let's dive into making your dream desk a reality!

    Planning Your Perfect Desk: Size, Style, and Materials

    Before you even touch a saw, you need a solid plan. This isn’t about grabbing some lumber and hoping for the best. We’re talking about precision and personalization. The first step is figuring out exactly what you need from your desk.

    Measuring Your Space and Needs

    Grab a tape measure and head to where your desk will live. How much space do you actually have? Don't just eyeball it â€" measure the width, depth, and any obstructions (like radiators or windows). Consider how much space you need for your computer, keyboard, monitor(s), paperwork, and any other essentials. Do you need extra drawers, shelves, or a monitor riser? Draw a quick sketch with your measurements â€" it’ll be invaluable later.

    Choosing Your Style

    What kind of vibe are we going for? Modern minimalist? Rustic farmhouse charm? Industrial chic? Your desk's style should complement the overall aesthetic of your room. Browse online for inspiration â€" Pinterest is your friend! Consider the type of wood: oak for a classic look, walnut for a rich, dark tone, maple for a lighter, brighter feel, or pine for a more rustic appeal. Each has its own unique character and workability.

    Selecting Your Materials

    Beyond the wood itself, you'll need to consider other materials. Will you use metal legs? How about a glass top? Perhaps some built-in cable management? Think about the durability and longevity you want from your desk. Hardwoods are generally more durable than softwoods, but they also come with a higher price tag. Consider your budget and how much time you're willing to spend on the project.

    Gathering Your Tools and Materials

    Now for the fun part â€" gathering your supplies! Don't worry if you don't have every single tool listed. You can often rent specialized equipment from tool rental stores. However, having a well-stocked workshop definitely speeds things along.

    Essential Tools

    • Measuring Tape
    • Pencil
    • Circular Saw or Table Saw
    • Miter Saw (for angled cuts)
    • Drill
    • Screwdriver (both Phillips and flathead)
    • Clamps
    • Sandpaper (various grits)
    • Wood Glue
    • Wood Finish (stain, varnish, polyurethane â€" your choice!)
    • Safety Glasses
    • Hearing Protection
    • Dust Mask

    Materials List (Example)

    This is a *sample* list; your exact needs will vary depending on your design:

    • Wood boards (adjust quantity and dimensions to your plan)
    • Wood screws
    • Dowels (optional, for extra strength)
    • Wood filler
    • Legs (wood or metal)
    • Casters (optional)
    • Drawer slides (if adding drawers)

    Construction: Building Your Desk

    This is where the real woodworking begins! Refer back to your detailed plan constantly. Take your time, be precise, and don’t rush the process. Accuracy in this stage will pay off massively in the end.

    Cutting the Wood

    Carefully cut your wood according to your measurements. Double-check your cuts before moving on to the next step. Use appropriate safety gear â€" safety glasses and hearing protection are must-haves!

    Assembling the Desk

    Use wood glue and screws to join the pieces together. Clamps will help keep everything aligned while the glue dries. If you’re using dowels, pre-drill pilot holes to prevent splitting the wood.

    Sanding and Finishing

    Once the desk is assembled, it's time for sanding. Start with a coarser grit sandpaper and gradually move to finer grits to achieve a smooth surface. After sanding, apply your chosen finish. Follow the manufacturer's instructions carefully. Multiple thin coats are better than one thick coat.

    Adding Personal Touches

    This is your chance to make your desk truly unique! Consider these fun additions:

    • Built-in cable management: Drill holes or create channels to keep your wires tidy.
    • Drawers or shelves: Add extra storage space to keep your workspace organized.
    • Customizable features: Incorporate a monitor riser, keyboard tray, or other ergonomic features.
    • Unique hardware: Choose knobs and pulls that complement your desk's style.
    • Inlays or decorative elements: Add a personal touch with wood inlays, etched designs, or other decorative elements.

    Frequently Asked Questions

    Here are some common questions I get about building custom desks:

    How long does it take to build a custom desk?

    It depends on the complexity of the design and your experience level. A simple desk might take a weekend, while a more elaborate one could take several weeks.

    How much does it cost to build a custom desk?

    The cost varies greatly depending on the materials you choose. Hardwoods are more expensive than softwoods, and adding features like drawers or intricate designs will increase the cost.

    What if I don't have all the tools?

    Many tools can be rented from home improvement stores or tool rental shops. Alternatively, you can consider partnering with a friend who has the necessary equipment.

    What type of wood is best for a desk?

    Hardwoods like oak, maple, and walnut are durable and long-lasting but can be more expensive. Softwoods like pine are more affordable but may require more maintenance.

    Can I build a desk without any woodworking experience?

    Yes, but start with a simpler design. There are plenty of beginner-friendly plans available online. Take your time, follow instructions carefully, and don't be afraid to ask for help.

    Building a custom desk is a rewarding experience that allows you to create a truly personalized workspace. Remember to plan carefully, gather the right tools, and most importantly, enjoy the process!

    Share:

    Elegant buffet woodworking projects for formal dining rooms

    Crafting Elegance: Exquisite Buffet Woodworking Projects for the Formal Dining Room

    The formal dining room, a space dedicated to refined gatherings and cherished memories, deserves furniture that reflects its grandeur. A handcrafted buffet, far from being mere storage, becomes a centerpiece, a testament to artistry and meticulous craftsmanship. This article explores the design and construction of several elegant buffet woodworking projects, perfect for enhancing the sophistication of your formal dining room. We’ll delve into the selection of woods, intricate detailing, and finishing techniques that elevate these pieces from functional furniture to stunning works of art.

    Choosing the Right Wood: A Foundation of Elegance

    The heart of any successful buffet project lies in the wood selection. Hardwoods, renowned for their durability and rich grain patterns, are the preferred choice for formal dining room pieces. Consider the timeless appeal of mahogany, with its deep reddish-brown hues and lustrous finish. Its inherent elegance lends itself beautifully to traditional styles. Alternatively, cherry offers a warm, mellow tone that ages gracefully, developing a richer patina over time. For a more contemporary feel, walnut's striking dark brown grain and subtle figuring can create a dramatic statement. The chosen wood not only impacts the visual aesthetic but also influences the workability and overall cost of the project. Before commencing, carefully evaluate the wood's characteristics, considering its density, grain orientation, and susceptibility to warping or cracking.

    Designing Your Dream Buffet: Style and Functionality

    The design phase is crucial. Begin by considering your existing dining room décor and personal style preferences. Do you favor classic, traditional designs, or a more modern aesthetic? Will the buffet primarily serve as storage or also feature display space? Sketch preliminary designs, experimenting with different proportions and configurations. Consider incorporating elements such as:

    • Intricate carvings: Delicate acanthus leaf carvings, or more geometric patterns, add a touch of opulence.
    • Detailed inlay work: Using contrasting wood species or other materials like mother-of-pearl can create stunning visual accents.
    • Elegant hardware: Choose high-quality pulls and knobs that complement the overall design, avoiding anything too flashy or modern.
    • Glass-fronted cabinets: Showcase fine china or glassware through carefully integrated glass panels.
    • Built-in wine storage: Add a specialized section for storing wine bottles, enhancing both functionality and style.

    Remember that even subtle design choices can dramatically impact the overall impression. A well-thought-out design ensures both form and function are harmoniously integrated.

    Construction Techniques: Precision and Patience

    Constructing a buffet requires meticulous attention to detail. Precise joinery techniques are essential for creating a strong and stable piece. Dovetail joints, renowned for their strength and beauty, are a classic choice for drawers and casework. Consider using mortise and tenon joints for frame construction, ensuring durability and a clean, elegant look. Utilize high-quality woodworking tools and clamps to maintain accuracy and consistency throughout the construction process. Take your time; rushing can lead to errors that are difficult, if not impossible, to correct later. Pay close attention to detail in every step, from cutting the wood to assembling the final components.

    Finishing Touches: Enhancing the Elegance

    The final stage elevates your handcrafted buffet to its full potential. Careful sanding is essential to achieve a smooth, flawless surface. Then, apply several coats of a high-quality finish that enhances the wood's natural beauty. A hand-rubbed oil finish offers a warm, subtle sheen, while a lacquer finish provides a more durable and glossy protection. Consider using a stain to deepen the wood's color or to achieve a specific hue. Remember, the finishing process is as crucial as the construction itself; it’s the final touch that transforms a well-built piece into a true heirloom.

    With careful planning, precision craftsmanship, and a touch of artistic flair, you can create a stunning buffet that will be the focal point of your formal dining room for generations to come. The process, while demanding, is immensely rewarding, resulting in a piece that reflects both your skill and your discerning taste.

    Share:

    Postingan Populer

    Search This Blog

    Powered by Blogger.

    Arsip Blog

    Entri yang Diunggulkan

    Build Simple and Easy Woodworking Projects with These Plans

    Simple and Easy Woodworking Projects with Detailed Plans Woodworking offers a rewarding and accessible hobby for individuals of all skill ...

    Recent Posts

    Pages